Last updated: May 2026 · Written from a 2-year journey — from nearly killing my first ivy to propagating 8 thriving plants
I almost killed my first English ivy within two months of bringing it home.
The leaves turned brown. Tiny spider webs appeared on the undersides. By December, the plant had dropped 80% of its foliage and looked like a sad collection of bare stems.
Sound familiar? If you’re struggling to keep your English ivy alive, you’re not alone. After two years of trial and error (and a lot of Googling at 2 AM), I’ve finally cracked the code. I went from nearly throwing that first plant away to successfully growing and propagating 8 healthy ivies.
In this guide, I’ll share everything I’ve learned about English ivy care — including the mistakes that almost cost me my plant, and the simple changes that turned everything around.
Quick Answer: How to Care for English Ivy
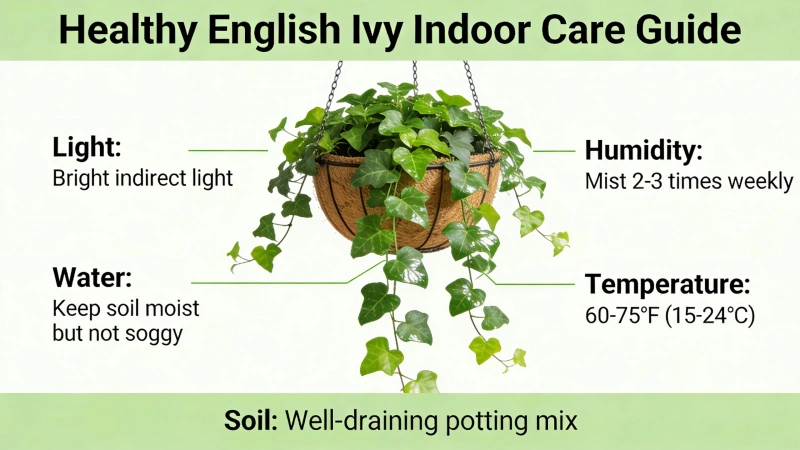
- Light: bright, indirect light (north- or east-facing window)
- Water: let the top 1 inch of soil dry out before watering
- Humidity: 40–50%+ — use a humidifier or pebble tray
- Temperature: 50–70°F (10–21°C) — ivy loves cool conditions
- Biggest threat: spider mites — shower the leaves monthly to prevent them
What Is English Ivy?
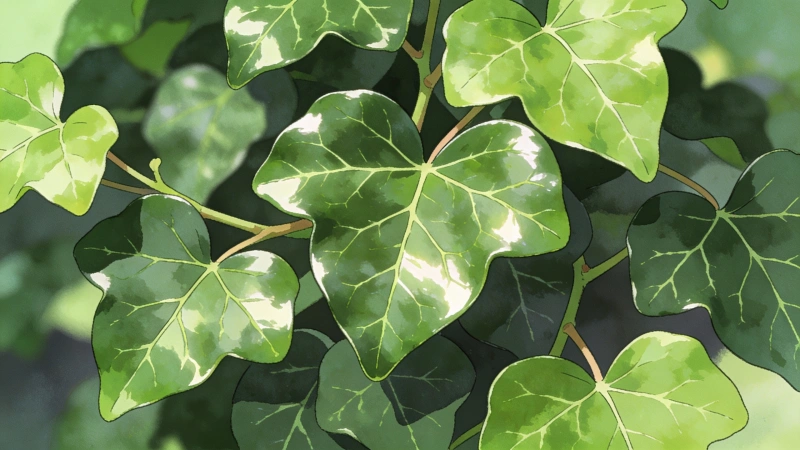
English ivy (Hedera helix) is a classic vining plant with heart-shaped leaves that adds a touch of elegance to any room. Originally from central and northern Europe, this evergreen climber has been a popular houseplant for centuries.
What I love about English ivy is its versatility. You can let it cascade from a hanging basket, train it up a trellis, or let it trail across a bookshelf. It comes in dozens of varieties — from solid green to beautifully variegated patterns with white or gold edges.
Light Requirements for English Ivy
Here’s something I learned the hard way: English ivy does NOT want direct sunlight.
When I first brought my ivy home, I placed it in a south-facing window, thinking more sun equals a happier plant. Within two weeks, the leaf tips started turning brown and crispy. The direct afternoon sun was literally burning the leaves.
English ivy thrives in bright, indirect light. The ideal spots are:
- North-facing window: gentle, consistent light all day
- East-facing window: soft morning sun, shade in the afternoon
- A few feet back from a south- or west-facing window: bright but protected from direct rays
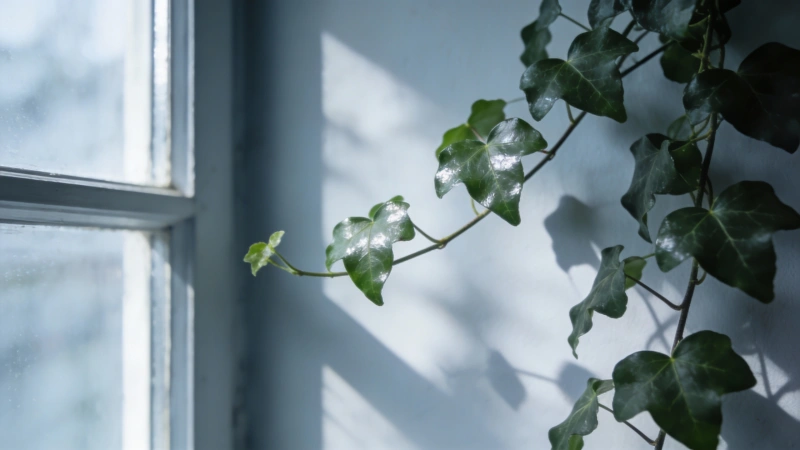
Pro tip for variegated varieties: if you have an ivy with cream or white leaf edges, it needs a bit more light than solid green types. Too little light, and those pretty variegations will fade to solid green.
If you’re looking for another plant that thrives in similar indirect light, check out my guide on how to care for an aloe vera plant — they make great companions on the same shelf.
How to Water English Ivy (Without Killing It)
This is where most people — including me — go wrong.
When I saw my ivy’s leaves turning brown, my first instinct was to water more. Big mistake. Brown leaf edges often signal overwatering, not underwatering — Clemson Cooperative Extension notes that soggy soil leads to root rot, which is exactly what produces those failing, browning leaves. The roots get too wet, can’t take up nutrients properly, and the foliage suffers.
Here’s the golden rule I now follow: let the top 1 inch of soil dry out before watering again.
My Watering Routine
- Stick your finger in the soil. If the top inch feels dry, it’s time to water.
- Water thoroughly. Pour until water drains from the bottom holes.
- Empty the saucer. Never let your ivy sit in standing water.
- Adjust seasonally. I water every 7–10 days in summer, every 10–14 days in winter.
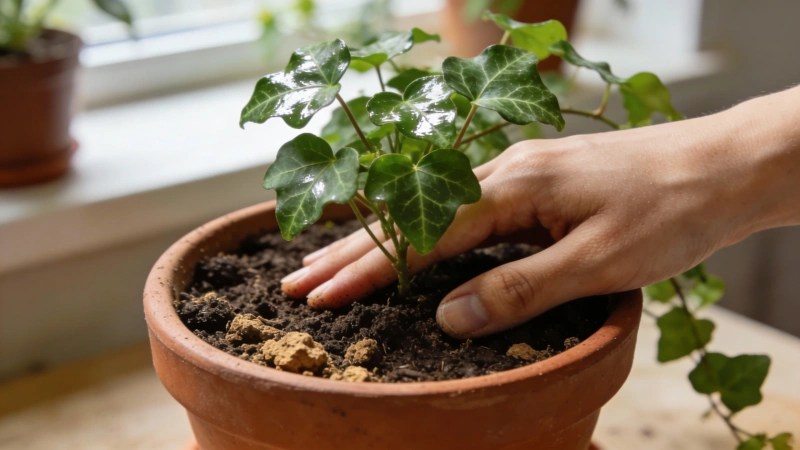
The #1 watering mistake: using a pot without drainage holes. English ivy’s roots will rot quickly in soggy soil. Always use a pot with holes at the bottom.
If you find English ivy’s watering needs too demanding, my snake plant care guide covers a famously drought-tolerant plant that might suit you better.
Humidity: The Secret Most People Miss
This is the game-changer that saved my dying ivy.
English ivy comes from the cool, moist forests of Europe, so it craves humidity. But most homes — especially in winter when the heat is blasting — sit at around 20–30% humidity. That’s basically desert conditions for an ivy. Clemson Cooperative Extension specifically notes that low humidity makes English ivy far more prone to spider mites, its number-one indoor pest.
Low humidity leads to:
- Brown, crispy leaf tips
- Leaves that feel dry and papery
- Spider mite infestations (more on that nightmare later)
5 Ways I Boost Humidity for My Ivy
| Method | Effectiveness | My Notes |
|---|---|---|
| Bathroom placement | ⭐⭐⭐⭐⭐ | Best option — shower steam does the work for you |
| Humidifier | ⭐⭐⭐⭐⭐ | Essential for winter — I run one Nov–Mar |
| Pebble tray | ⭐⭐⭐⭐ | Fill a tray with pebbles and water; set the pot on top |
| Group plants together | ⭐⭐⭐ | Plants create their own microclimate |
| Misting | ⭐⭐ | Temporary relief — evaporates within hours |
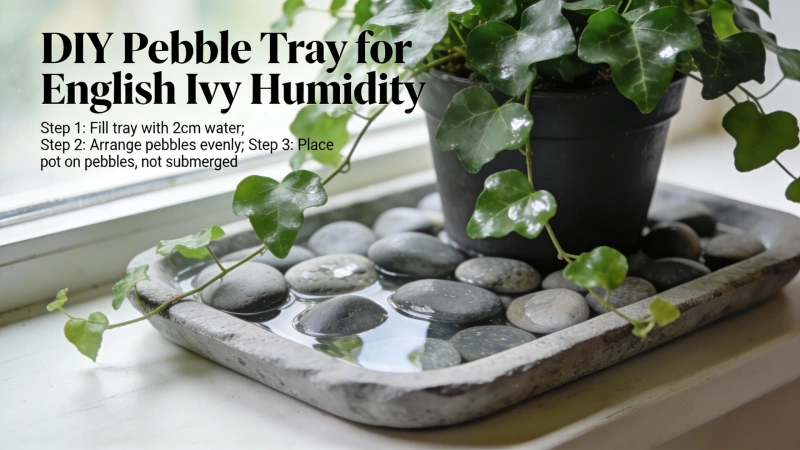
When my ivy was on its last legs, I moved it to the bathroom. One month later, it started pushing out new growth. The steam from daily showers gave it exactly what it needed.
If you enjoy high-humidity plants, my guide on how to care for a Boston fern covers another beautiful plant with similar humidity requirements.
Temperature: Ivy Likes It Cool
Here’s something that surprised me: English ivy doesn’t want to be warm.
This plant evolved in the cool, damp forests of England and Northern Europe. It actually prefers temperatures between 50–70°F (10–21°C) — cooler than most of us keep our homes in winter.
The biggest temperature mistakes I made:
- Placing the pot near a radiator — the dry heat stressed the plant within days
- Putting it near a heating vent — hot air blasts are an ivy’s worst nightmare
- Leaving it in a drafty doorway — temperature swings cause leaf drop
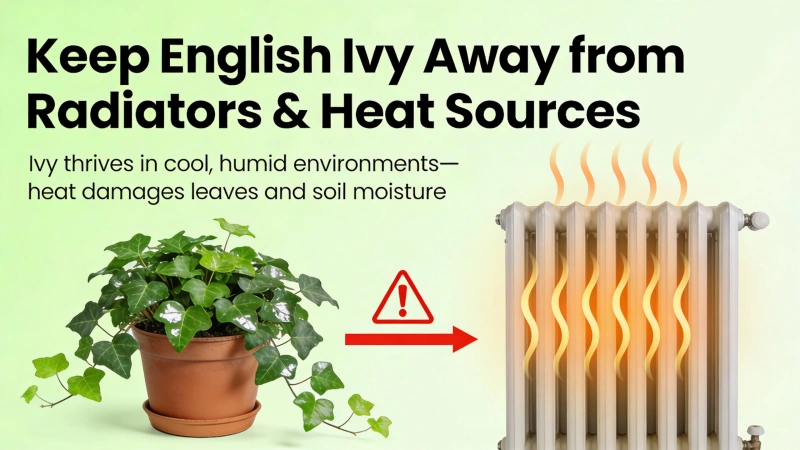
Ideal locations: a cool hallway, an unheated spare room, or a bathroom (which also solves the humidity problem!).
Spider Mites: English Ivy’s #1 Enemy
If there’s one thing you take away from this article, let it be this: English ivy is a spider mite magnet.
These tiny pests thrive in exactly the conditions most homes offer during winter — warm and dry. I learned this the hard way when I noticed delicate webbing on my ivy’s leaves and wondered why the plant looked so sickly.
How to Spot Spider Mites
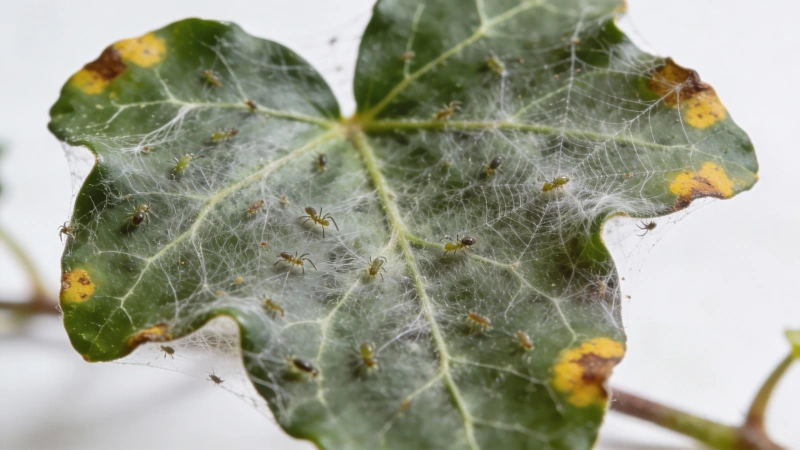
Spider mites are barely visible to the naked eye. Look for:
- Fine, silk-like webbing on the undersides of leaves
- Tiny yellow or brown speckles on the leaves
- Leaves that look dusty or dull
- Tiny moving dots (that’s them!)
How to Get Rid of Spider Mites
When I discovered spider mites on my ivy, I researched every method out there. Here’s what actually worked:
| Treatment | How To Do It | Frequency |
|---|---|---|
| Shower rinse | Blast leaves with water, focus on undersides | Every 3 days for 2 weeks |
| Soapy water dunk | Dunk plant upside-down in soapy water (1 tsp dish soap per quart) | Every 5 days, 4 times total |
| Neem oil spray | Mix per label, spray all surfaces | Weekly for 3–4 weeks |
| Increase humidity | Humidifier, pebble tray, bathroom placement | Ongoing prevention |
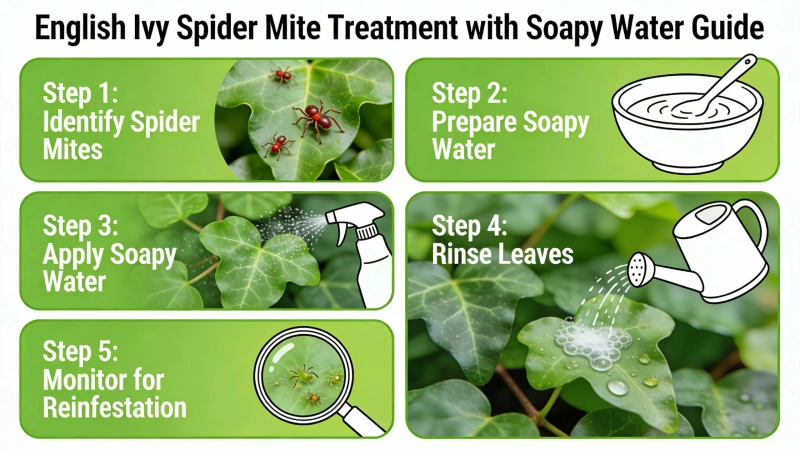
Prevention is easier than treatment. I now give my ivy a monthly “shower” — just putting it in the bathtub and rinsing all the leaves with lukewarm water. It takes 5 minutes and has kept spider mites away for over 12 months.
If the infestation has already taken hold and these methods aren’t enough, my dedicated guide on how to get rid of spider mites goes deeper into breaking their life cycle for good.
Seasonal Care Calendar for English Ivy
English ivy’s needs change throughout the year. Here’s the schedule I follow:
| Season | Watering | Fertilizing | Special Tasks |
|---|---|---|---|
| 🌱 Spring | Every 7–10 days | Monthly (half-strength) | Repot if needed; take cuttings for propagation |
| ☀️ Summer | Every 5–7 days | Monthly (full-strength) | Move outdoors to a shaded patio if desired |
| 🍂 Fall | Every 10–14 days | Stop by October | Bring indoors; check for hitchhiking pests |
| ❄️ Winter | Every 10–14 days | None | Increase humidity; watch for spider mites! |
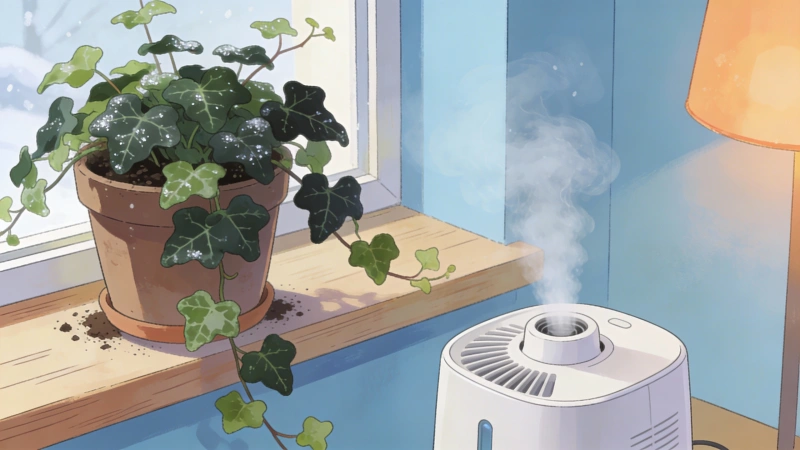
Winter is the hardest season for indoor ivy. The combination of dry heated air, lower light, and reduced watering stresses the plant. I lost the most leaves during my first winter. Now I know to prioritize humidity above all else during these months.
My 2-Year English Ivy Journey: From Near-Death to Thriving
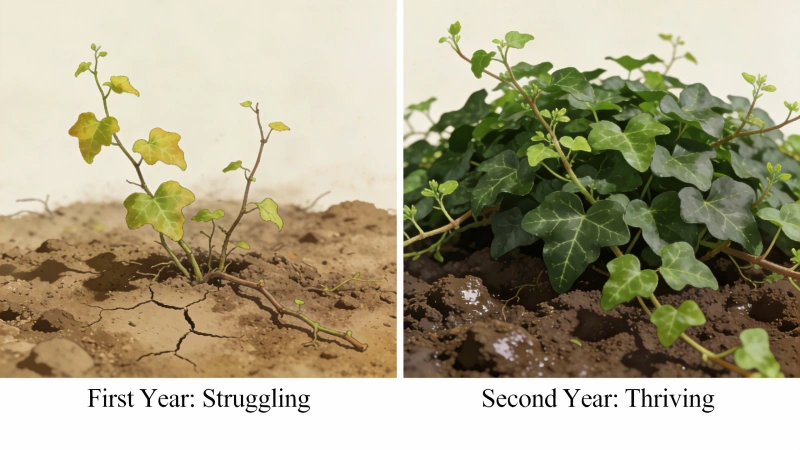
Let me share exactly what happened with my first English ivy — and how I turned things around.
The Starting Point (October 2022)
I bought a beautiful green English ivy from my local nursery. It had lush foliage and vines about 8 inches long. I was excited to add some greenery to my living room. My setup: south-facing window, 3 feet from a radiator, watered every Saturday “just to be consistent.”
What Went Wrong
Week 2: leaf tips started turning brown. I figured it needed more water, so I increased watering to twice a week. (Wrong move.)
Week 4: noticed fine webbing on the undersides of leaves. After some Googling at 2 AM, I realized I had spider mites.
December: the plant had lost about 80% of its leaves. It looked like a skeleton with a few sad survivors clinging on. I nearly threw it away.
How I Fixed It
I made four key changes:
- Moved it to a north-facing window — no more direct sun stress
- Stopped the overwatering — only watered when the top inch of soil was dry
- Treated the spider mites aggressively — soapy water dunk every 5 days, 4 times total
- Increased humidity — moved it to the bathroom for a month, then added a humidifier to my living room
The Results
- 6 months later: new growth appeared — tiny baby leaves unfurling from the stems
- 1 year later: the vines grew from 8 inches to over 4 feet long
- 2 years later: I’ve propagated 8 new plants from cuttings, and gave 4 to friends
- Winter leaf drop: went from 80% to about 15%
- Spider mites: 12+ months without a single recurrence
What I Learned
Humidity matters more than watering. I was so focused on the watering schedule that I ignored the dry air. Once I fixed the humidity, everything else fell into place.
Ivy is from England, not the tropics. It wants cool, moist air — not the warm, dry environment most of us create indoors.
Prevention beats treatment. A 5-minute monthly shower saves hours of spider mite battles.
Common English Ivy Problems (And How to Fix Them)
If your ivy is showing distress signals, use this quick diagnostic table:
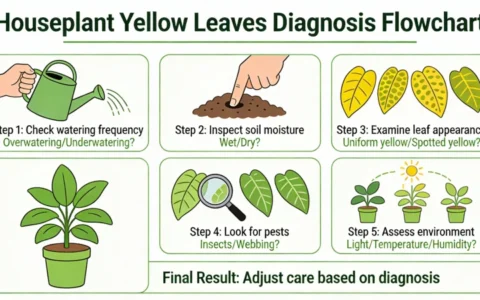
| Symptom | Likely Cause | Quick Fix |
|---|---|---|
| Brown leaf tips/edges | Low humidity; overwatering; too much sun | Increase humidity; check drainage; move to indirect light |
| Yellow leaves | Overwatering; poor drainage; needs fertilizer | Let soil dry; ensure drainage holes; fertilize in spring |
| Dropping leaves | Temperature swings; near heat source; draft | Move to a stable spot away from heaters/AC |
| Yellow spots + webbing | Spider mites! | Isolate plant; shower rinse; soapy water treatment |
| Variegation fading | Not enough light | Move to a brighter (but still indirect) location |
| Slow/leggy growth | Low light; needs pruning | Increase light; pinch tips for bushier growth |
| Mushy stems | Root rot from overwatering | Remove from pot; trim rotted roots; repot in fresh soil |
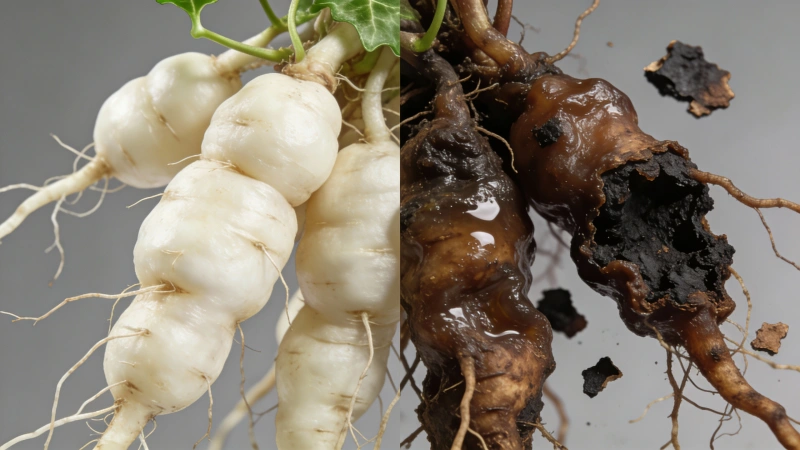
How to check for root rot: gently slide the plant out of its pot. Healthy roots are white or light tan and feel firm. Rotted roots are brown or black, feel mushy, and often smell bad. If you find rot, trim off all affected roots with clean scissors and repot in fresh, well-draining soil.
How to Propagate English Ivy (Super Easy!)
Good news: English ivy is one of the easiest houseplants to propagate. Once you get the hang of it, you can create unlimited free plants. I’ve had the most success with water propagation. Here’s my step-by-step method:
Water Propagation Steps
- Choose a healthy stem. Look for vibrant growth, no signs of pests or disease.
- Make your cut. Snip a 4–6 inch section, cutting just below a node (the bump where leaves attach).
- Remove lower leaves. Strip off any leaves that would be underwater — they’ll rot.
- Place in water. Use a clear glass or jar with about 3 inches of water.
- Find a bright spot. Set it near a window with indirect light.
- Change water weekly. This prevents bacteria buildup and keeps roots healthy.
- Wait 3–4 weeks. You’ll see roots forming from the submerged nodes.
- Transplant when ready. Once roots are 2–3 inches long, pot up in soil.
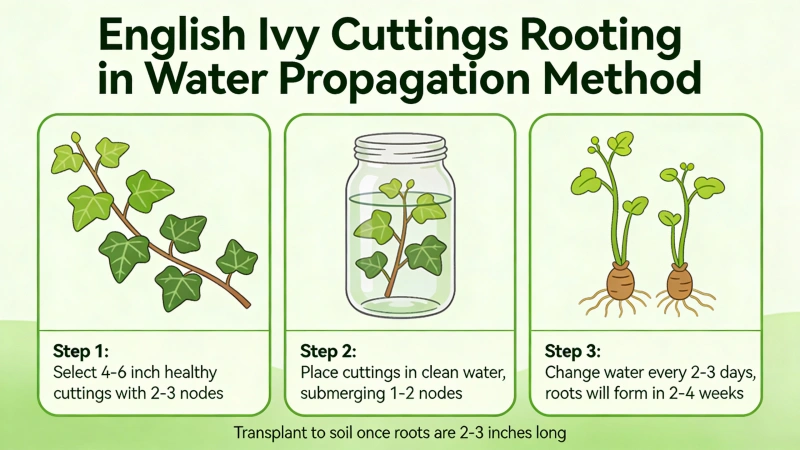
My propagation results: from 10 cuttings, 9 successfully rooted — a 90% success rate. The one that failed had a leaf sitting in the water that rotted.
For more propagation tips, Gardening Know How has a detailed guide on both water and soil methods.
If you enjoy propagating plants, you might also like my guide on how to care for a Christmas cactus — another easy-to-propagate plant that makes a beautiful holiday gift.
Watch: English Ivy Propagation Tutorial
This video demonstrates the complete water propagation process:
Frequently Asked Questions
How do I care for English ivy indoors?
Give English ivy bright, indirect light (a north- or east-facing window is ideal), water only when the top inch of soil is dry, and — most importantly — keep humidity above 40% with a humidifier, pebble tray, or bathroom placement. Keep it cool (50–70°F) and away from radiators and vents, and give it a monthly leaf shower to prevent spider mites.
Why is my English ivy turning brown?
Brown, crispy leaf tips are most often caused by low humidity, but overwatering and too much direct sun can do the same. Raise the humidity around the plant, check that the soil drains well and isn’t staying soggy, and move it out of direct afternoon sun. Also check the undersides of leaves for spider mite webbing.
Is English ivy toxic to cats and dogs?
Yes. According to the ASPCA, all parts of English ivy are toxic to pets if ingested. Symptoms include vomiting, drooling, diarrhea, and abdominal pain. Keep your ivy in a hanging basket or on a high shelf if you have curious pets.
Why is my English ivy dropping leaves like crazy?
The most common causes are low humidity (especially in winter), temperature fluctuations near heating vents or drafty doors, overwatering that stresses the roots, and a recent location change. Start by checking humidity levels and moving the plant away from any heat sources.
How often should I water English ivy?
There’s no one-size-fits-all answer — use the finger test. Stick your finger an inch into the soil: if it’s dry, water; if it’s still moist, wait a day or two. In practice that’s roughly every 7–10 days in summer and every 10–14 days in winter.
Will spider mites spread to my other plants?
Yes. Spider mites are mobile and will happily move to nearby plants. If you spot them on your ivy, immediately isolate it from your other plants and check the neighbors closely for the next few weeks.
Final Thoughts
English ivy has a reputation for being finicky indoors, but once you understand what it actually wants, it’s remarkably rewarding. Here’s what matters most:
- Bright, indirect light — never direct sun
- Water when dry — not on a schedule
- Humidity, humidity, humidity — this is usually the missing piece
- Cool temperatures — keep it away from heat sources
- Monthly shower — your best weapon against spider mites
I went from nearly killing my first ivy to growing 8 beautiful plants. If I can do it, so can you.
Got the humidity habit down? Then you’re ready for another moisture-loving beauty — my Calathea care guide covers a stunning patterned tropical that rewards the same attention to humidity you’ve now mastered with ivy.
Got questions? Drop a comment below — I’m happy to help troubleshoot!
Happy growing! 🌿
This article was created by a professional team. AI tools were used during the research and writing process to enhance efficiency and quality. All information has undergone manual verification and editing to ensure accuracy and practicality. We are committed to providing readers with objective and valuable content.
Publisher::Spring Mei,Please indicate the source when reposting:https://gardeningtoolsgarden.com/how-to-care-for-english-ivy/