A rubber plant (Ficus elastica) can grow into an impressive indoor tree with glossy leaves, but it shows stress quickly when light, watering, or drainage is off. If yours has yellow leaves, drooping foliage, brown patches, or unexpected leaf drop, check the growing conditions before you reach for fertilizer or the watering can.
This rubber plant care guide covers where to put your plant, how to decide when to water, what common symptoms mean, and how to prune, repot, and propagate it. A diagnosis table and a care checklist help you act on what you see instead of a rigid calendar.
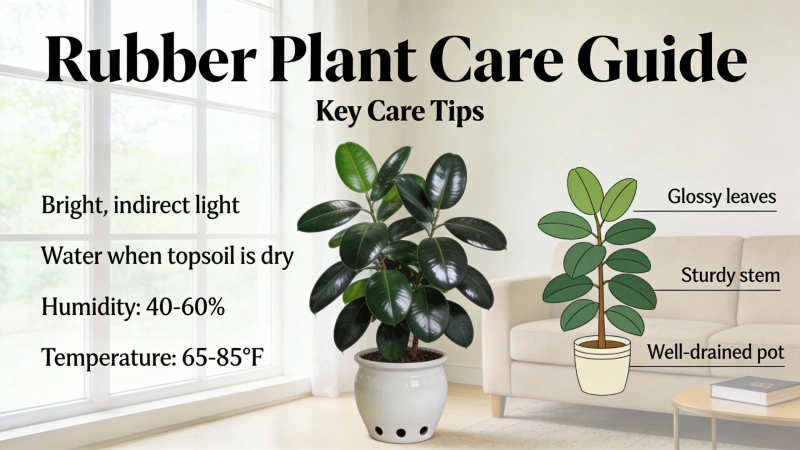
Quick answer: How do you care for a rubber plant? Place Ficus elastica in bright, indirect light and grow it in well-draining potting mix in a pot with drainage holes. Check the soil before watering, water thoroughly once it has dried out enough, and empty the saucer afterward. Protect the plant from cold drafts, wipe dust off the leaves, and feed lightly while it’s actively growing. If leaves yellow or drop, look at soil moisture, roots, light, and temperature before deciding on a fix.
| Care factor | Practical recommendation |
|---|---|
| Botanical name | Ficus elastica |
| Light | Bright, indirect light; some morning sun or partial shade is suitable |
| Water | Check soil dryness and pot weight; avoid constantly wet roots |
| Soil | Airy, well-drained indoor potting mix |
| Pot | Drainage holes; choose size according to the root ball |
| Temperature | Warm indoor conditions; avoid temperatures below about 55°F (13°C) and cold drafts |
| Fertilizer | Light feeding during active growth; follow product directions |
| Common problems | Yellow leaves, leaf drop, root rot, scale, mealybugs, spider mites |
| Pet caution | Milky sap can irritate skin and the mouth; prevent pets from chewing it |
What Is a Rubber Plant? Ficus elastica Varieties Explained
The rubber plant is a tropical evergreen tree in the fig family (Moraceae). Its thick, leathery leaves and upright habit make it a popular indoor statement plant. The name comes from its milky sap. It isn’t the same plant as the compact Peperomia obtusifolia, often sold as the “baby rubber plant.”
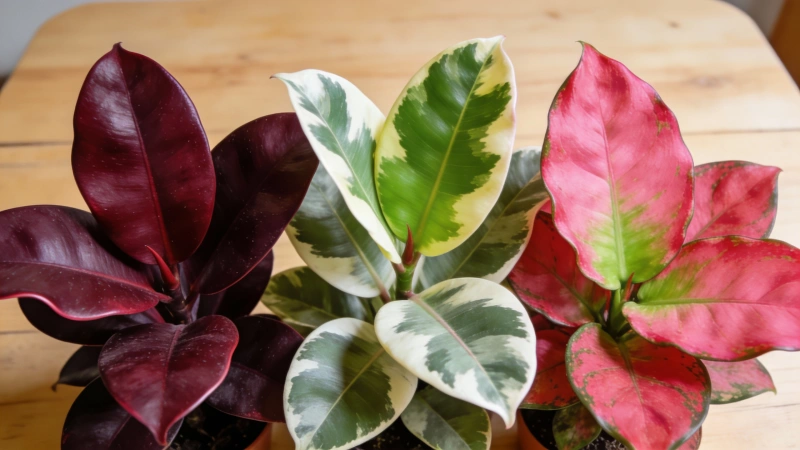
Common Ficus elastica cultivars include:
- ‘Burgundy’: dark, red-tinted foliage that can look nearly black in some lighting.
- ‘Tineke’: cream-and-green variegation; it needs bright enough light to keep its pattern.
- ‘Ruby’ or ‘Red Ruby’: pink, green, and cream variegation, with color influenced by light and leaf age.
- ‘Robusta’: broad, rich green leaves and a classic upright form.
For extension-backed care recommendations, see Clemson Cooperative Extension’s rubber plant factsheet and NC State Extension’s Ficus elastica profile.
1. Rubber Plant Light Requirements: Where Should It Go?
Bright, indirect light is a reliable starting point. An east-facing window, or a spot set back from a bright south- or west-facing one, often provides plenty of light without exposing the leaves to harsh afternoon sun. Morning sun is generally easier on the plant than strong midday sun, especially for a plant raised under nursery shade.
Rubber plants may tolerate lower light, but growth usually slows. Variegated cultivars may need a brighter spot than darker-leaved ones to grow well. Avoid sudden changes: move a plant toward brighter light over several days rather than putting it straight into intense sun.
| Location / light | Likely response | What to do |
|---|---|---|
| Bright filtered window light | Good potential for steady leaf production | Maintain and rotate occasionally if growth is one-sided |
| Medium light | Slower growth and fewer new leaves | Watch plant response; move closer to a window if needed |
| Dark corner | Leggy growth, smaller new leaves, loss of lower leaves | Improve available light gradually |
| Sudden strong afternoon sun | Pale, scorched, or bleached patches | Filter light or move slightly away from glass |
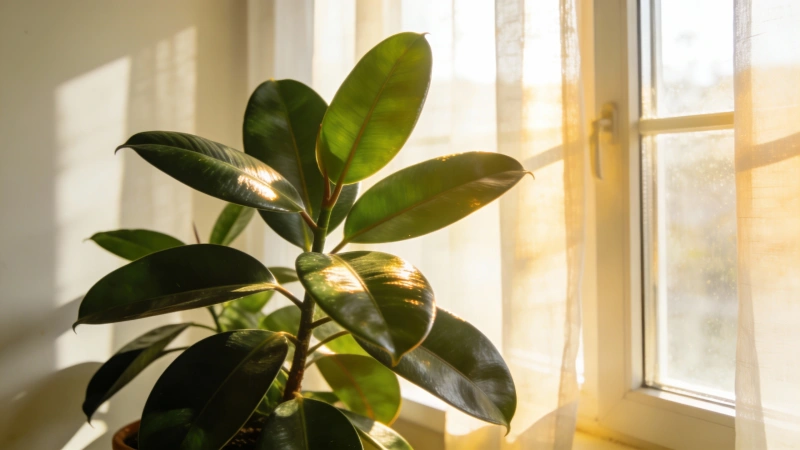
A useful clue: slow, stretched growth points toward too little light, while dry, bleached patches that appear after a move can mean too much direct sun. Neither symptom proves the cause on its own, so check watering and temperature too.
2. How Often Should You Water a Rubber Plant?
There is no dependable “water every seven days” rule. A rubber plant in a small terracotta pot by a bright window can use water much faster than one in a large plastic pot in a cool room, and potting-mix texture, root size, season, heating, and airflow all change how quickly the soil dries.
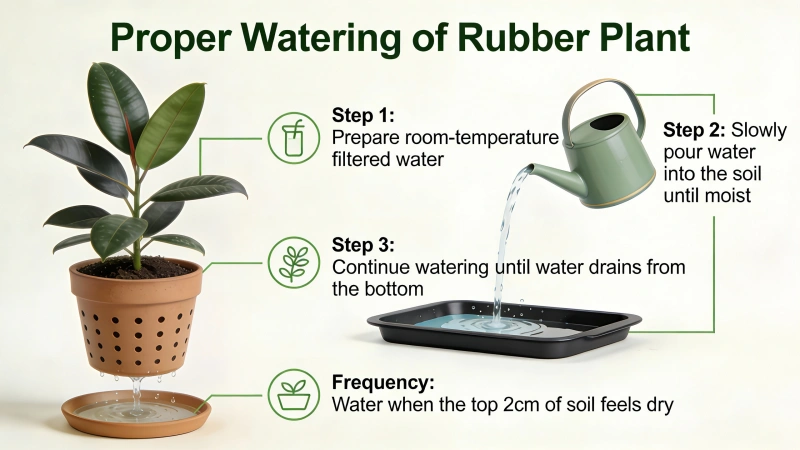
Use this three-part watering test instead:
- Feel the soil: check the upper 1–2 inches in small pots, and go deeper in larger containers with a clean wooden skewer or similar tool. The surface can be dry while the root zone is still moist.
- Check the pot’s weight: learn how the container feels just after watering and how it feels when it’s ready for more. This helps most when the surface dries quickly.
- Look at the plant and its environment: if the soil is drying and the plant is actively growing, it may need water. If the mix is still very wet, don’t add more just because a leaf is drooping.
When watering is needed, water slowly until some drains from the bottom, then empty the saucer or outer decorative cachepot so the root ball never sits in water. In cool, low-light months, check moisture the same way, but expect the soil to take longer to dry.
Don’t rely on severe wilting as your main signal. A rubber plant can wilt from a dry root ball or from damaged, oxygen-starved roots, and the right response depends on what the soil and roots are doing.
Should you water more in summer and less in winter?
Often yes, but light and indoor temperature count for more than the calendar. An actively growing rubber plant under strong supplemental light may still use a lot of water in winter, while a cool, dim spot may dry slowly even in summer. Record your observations for a few weeks rather than copying someone else’s schedule.
If the soil stays wet and tiny flies hover around the pot, our guide to fungus gnats in houseplant soil can help you identify them and the moisture-related factors behind them. Fungus gnats alone don’t prove root rot.
3. Best Soil for Rubber Plants and When to Repot
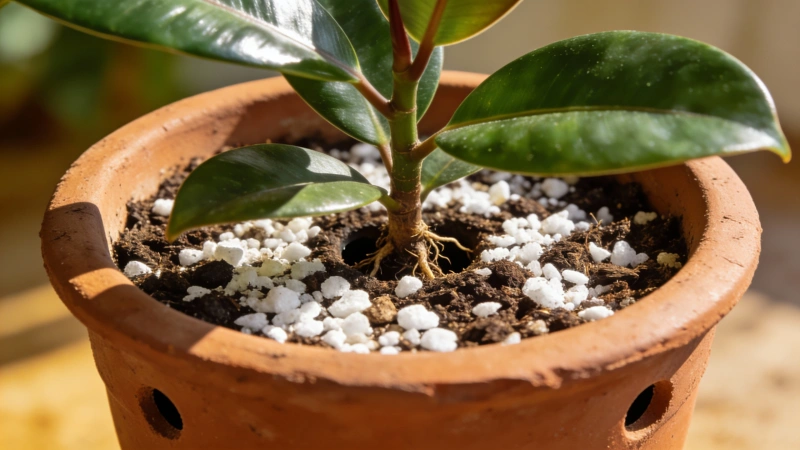
Choose a loose, water-retentive but well-aerated indoor potting mix. Commercial houseplant soil often works well when paired with drainage holes. If the mix stays soggy or compacts badly, you can improve its structure with a suitable amount of perlite or coarse bark. No single mix ratio is right for every rubber plant.
Choose the container by the root ball, not by how tall you want the plant to become. When roots are crowded and the plant dries much faster than before, move up modestly in pot size, typically only a little wider than the existing root system. An excessively large pot can hold moisture longer than a small root system can use it.
How to repot a Ficus elastica
- Water or lightly moisten the root ball beforehand if it is extremely dry and brittle.
- Gently slide the plant from its pot and examine the roots without stripping away healthy ones unnecessarily.
- Check for soft, collapsing roots or persistent sour-smelling, saturated mix.
- Choose a stable pot with drainage, sized to the remaining healthy root system.
- Add fresh potting mix around the root ball without packing it tightly.
- Water according to how moist the root ball and new mix are, rather than following a fixed waiting period after repotting.
- Keep the plant in a stable, appropriately lit location while the roots settle in.
Soft, decaying roots need more than a new pot. Our root rot treatment guide explains how to diagnose the problem and decide which roots to remove. If you’re sorting through several problems at once, the broader dying houseplant recovery guide can help you organize your checks.
4. Temperature, Humidity, Fertilizer, and Leaf Cleaning
Temperature and humidity
Normal warm indoor temperatures generally suit this plant. Clemson Extension recommends approximately 75–80°F during the day and 60–65°F at night, and advises avoiding temperatures below 55°F. Keep the plant away from cold exterior doors, drafty windows, and direct blasts from heating or air-conditioning vents.
Average indoor humidity is often fine, although very dry air can add to the stress. A humidifier isn’t automatically necessary. Misting isn’t a lasting fix for leaf problems, so correct light, watering, and drafts first.
When to fertilize
If your plant is actively producing new growth, a balanced houseplant fertilizer applied at the product’s recommended rate can replenish nutrients. Needs vary with the potting mix, light, and growth rate. Reduce or pause feeding when growth slows and the plant isn’t using nutrients quickly. Hold off on extra fertilizer to fix yellow leaves until you know what’s causing them.
How to clean glossy rubber plant leaves
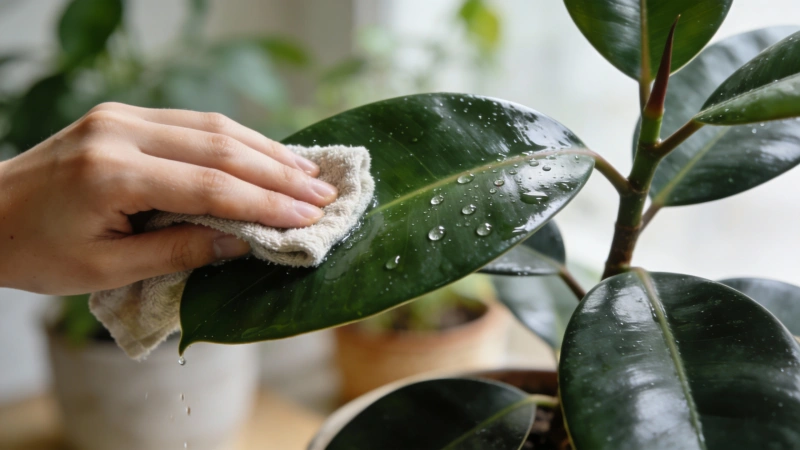
Wipe dust away with a clean, damp, soft cloth, supporting the leaf from beneath. Avoid milk, cooking oil, and commercial shine products unless they’re specifically formulated and recommended for the plant; residue can collect dust or cause unwanted spotting. While you clean, inspect leaf undersides for scale, mealybugs, and mites.
5. Rubber Plant Problems: Yellow Leaves, Drooping, Brown Spots, and Leaf Drop
Common symptoms overlap, so a quick visual guess is often wrong. Use the table below to decide what to inspect before changing the care routine.
| Symptom | Possible explanation | What to check first | Next step |
|---|---|---|---|
| Lower leaves slowly turn yellow | Normal aging or a watering/light issue | Is it one old leaf, or are several yellowing quickly? | Monitor if isolated; inspect roots and conditions if widespread |
| Yellow leaves + wet soil | Excess moisture, low root oxygen, possible root decay | Drainage, pot weight, root firmness | Stop unnecessary watering; investigate persistent saturation |
| Drooping + very dry soil | Water deficit | Root-ball moisture, dry compacted mix | Rehydrate properly; check that water penetrates the mix |
| Sudden leaf drop | Drafts, moving the plant, temperature stress, watering changes | Recent relocation, cold exposure, soil moisture | Restore stable conditions, then monitor |
| Pale or bleached patches | Sun scorch or abrupt light change | Direct sun exposure and timing | Filter strong light and acclimate gradually |
| Brown crispy edges or tips | Dryness, salt buildup, or environmental stress | Watering history, fertilizer use, dry air | Correct the cause before pruning damaged edges |
| Small pale speckles / webbing | Spider mites | Leaf undersides, moving specks, white paper test | Confirm pest and follow appropriate control guidance |
| Sticky leaves, raised bumps, cottony clusters | Scale or mealybugs | Stems and leaf undersides | Isolate and identify the pest before treatment |
| Long gaps between leaves | Insufficient light or one-sided light | Distance from window, new leaf size | Move gradually to brighter light |
Why are my rubber plant leaves turning yellow?
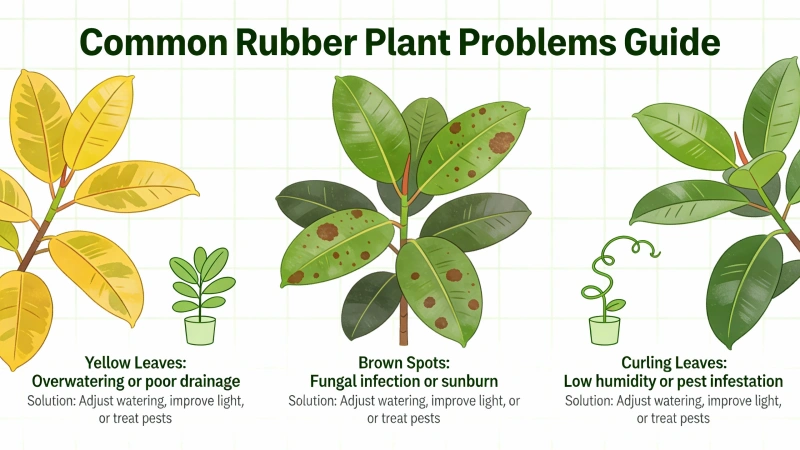
Start by deciding whether it’s a single older leaf aging out or several leaves yellowing quickly. Then check soil moisture below the surface. If the mix stays wet and the roots feel soft, root trouble is possible. If the soil is dry and the plant has been in weak light, dryness or light stress may be involved. Don’t add water just because leaves are yellow. Our yellow houseplant leaves diagnosis guide covers the wider range of causes.
What if rubber plant leaves are dropping?
Rubber plants can shed leaves after sudden changes in their environment. Ask yourself: Has the plant been moved? Is a cold draft hitting it? Has the room become darker? Is the root ball dry or constantly wet? Correct the most likely stress and watch for new growth. A dropped leaf won’t reattach, but healthy growth can resume when conditions improve.
What if leaves have spots or pests?
Inspect both sides of each affected leaf. Sun scorch, cold injury, pest feeding, and disease can sometimes look similar. Don’t assume every brown patch is anthracnose and reach for a fungicide. Penn State Extension’s Ficus disease reference and UC Cooperative Extension’s rubber plant spotting guide describe several distinct causes.
For fine stippling or delicate webbing, follow our spider mite identification and treatment steps. For other insects and disease clues, visit the plant pests and diseases section. Use a pest-control product only if its label lists the target pest, the intended plant, and the application site.
6. Pruning and Propagating a Rubber Plant
How do you make a rubber plant bushier?
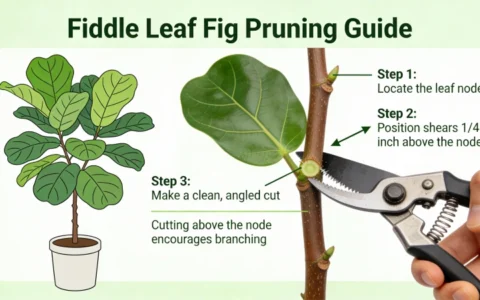
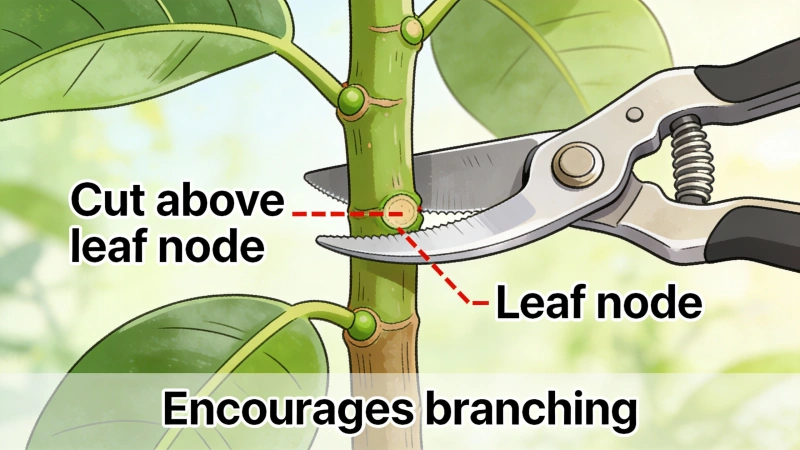
Pruning the growing tip can encourage buds below the cut to grow, creating a fuller shape over time. But one cut doesn’t guarantee two new branches. Timing, plant vigor, and the number of active buds all matter.
- Choose a healthy plant in active growth rather than one struggling with root rot.
- Wear gloves and protect surfaces from milky sap.
- Use clean, sharp pruning tools and cut just above a suitable node.
- Give the plant time to respond, and keep light and watering consistent.
- Stake taller plants when needed rather than cutting solely to compensate for instability.
Can you grow a rubber plant from a cutting?
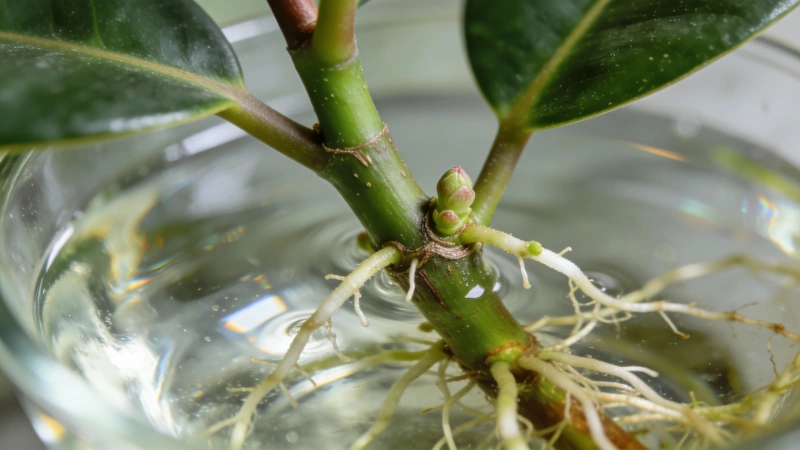
Yes. Rubber plants can be propagated by stem cuttings or layering, although woody material may be slower or less dependable than easy-rooting vining houseplants. A leaf on its own, without a node, isn’t a reliable way to grow a new plant.
For a stem cutting:
- Take a healthy stem section that includes at least one node, using clean pruners and gloves.
- Remove lower leaves that would touch the rooting medium, leaving enough foliage to support growth without excessive moisture loss.
- Root the stem in a moist, well-drained propagation medium, kept warm and in bright, indirect light.
- Maintain humidity without sealing wet foliage in stagnant air; ventilate a propagation cover as needed.
- Check for genuine root development before transplanting, and be patient: rooting time varies substantially.
Air layering is often especially useful for tall, woody rubber plants. It lets a new root system form on a stem while the stem is still attached. Iowa State University Extension provides step-by-step Ficus air-layering instructions, including the use of moist sphagnum moss and a protective wrap. If your goal is to reduce a very tall plant, air layering is often worth considering before you cut off the entire top.
7. Is a Rubber Plant Toxic to Cats and Dogs?
Keep Ficus elastica away from pets that chew plants. Its sticky white sap can irritate skin and mucous membranes and may cause digestive upset if eaten. If a pet has chewed the plant and is showing symptoms, contact a veterinarian rather than assuming the reaction will be mild.
Important name mix-up: The “baby rubber plant” (Peperomia obtusifolia) is a different species from Ficus elastica. The ASPCA lists Peperomia obtusifolia as non-toxic to cats and dogs. Don’t assume Ficus elastica is also safe just because both are sold as rubber plants.
For more on the irritant sap of Ficus elastica, see Clemson Extension. If you’re looking for alternatives, our Chinese money plant care guide covers a smaller houseplant option. Whatever you choose, confirm the plant’s botanical identity before making pet-safety decisions.
Rubber Plant Care Checklist: A Simple Monthly Routine
- Check soil moisture and pot weight before watering.
- Empty any water collected in a decorative outer pot or saucer.
- Look at new leaf size and spacing for clues about light.
- Inspect stems and leaf undersides for scale, mealybugs, and mites.
- Wipe dusty leaves gently with a damp cloth.
- Check for cold drafts, nearby heating vents, and sudden changes.
- Record the date and the reason for any repotting, pruning, or fertilizing.
- Compare new leaf growth with old damaged leaves instead of expecting old injury to disappear.
Useful care log: Write down the date, soil moisture (dry / slightly moist / wet), whether you watered, the window location, and any new symptoms. Even four weeks of notes can reveal patterns that a generic watering calendar misses.
Frequently Asked Questions About Rubber Plant Care
How often should I water a rubber plant indoors?
Check the soil rather than following a fixed weekly schedule. Let the potting mix dry down between waterings, but don’t leave the plant severely dehydrated. The interval shifts with light, temperature, pot size, and season.
Can a rubber plant grow in low light?
It may tolerate moderate or somewhat lower light, but bright filtered light usually supports stronger growth. In deep shade, expect slower growth and potentially smaller leaves or stretched stems.
Why are the bottom leaves on my rubber plant yellow?
An occasional older lower leaf can yellow as it ages. Rapid or widespread yellowing calls for checking root-zone moisture, drainage, temperature stress, light, and possible pests.
Why does my rubber plant keep losing leaves?
Common triggers include cold drafts, changes in placement, inconsistent watering, and inadequate light. Check the environment and roots before assuming a single cause.
Should I mist a rubber plant?
Misting isn’t a substitute for proper soil moisture or stable conditions, and not every home needs it. If the air is excessively dry, address that with suitable room conditions, and avoid leaving the foliage persistently wet.
When should I repot my Ficus elastica?
Repot when roots are crowded, drainage is poor, or the potting mix has deteriorated, preferably while the plant is actively growing. Use a container only modestly wider than the healthy root system.
How tall can a rubber plant grow indoors?
Given suitable conditions, it can reach several feet. Clemson Extension notes that 6–10 feet or more is possible indoors, and pruning and available space help determine its final shape.
Does cutting the top off a rubber plant make it branch?
It can encourage buds below the cut to grow, but the number and timing of branches aren’t guaranteed. Start with a healthy plant and prune during active growth.
Can you propagate a rubber plant in water?
A stem cutting with a node may form roots in water, but results vary. A suitable propagation medium and air layering are also options. Don’t mistake a rooted leaf with no node for an established new plant.
Final Takeaways
The biggest improvement you can make to rubber plant care is to swap fixed rules for a short observation habit. Give the plant suitable light, check the root zone before watering, use a pot that drains, and investigate symptoms before treating them. New growth is a better long-term indicator of success than leaves that were damaged weeks ago.
For other species and their different watering and lighting needs, browse our houseplant care guides.
Sources and Further Reading
- NC State Extension: Ficus elastica — light, watering, cold drafts, pruning, and pest identification.
- Clemson Extension: Rubber Plant — temperature, root rot, foliage, and sap cautions.
- University of Florida IFAS: Ficus elastica — container drainage and propagation.
- Iowa State Extension: How to Propagate a Rubber Tree — air layering.
- Penn State Extension: Ficus Diseases — distinguishing disease and environmental damage.
- ASPCA: Baby Rubber Plant — Peperomia obtusifolia identity and pet safety.
Editorial Note: This article was written and edited by Spring Mei. AI tools may be used to assist with research and organizing information. The final content is reviewed before publication, and important factual claims are checked against reliable sources where appropriate. Personal experience is distinguished from general guidance, and methods are described as personally tested only when they have actually been tested.
Please indicate the source when reposting:https://gardeningtoolsgarden.com/how-to-care-for-a-rubber-plant/
Author: Spring Mei