Last updated: May 2026 · Written from 3 years of hands-on rescues — including the prayer plant that lost half its leaves and came back fuller than ever
I’ve killed more plants than I’d like to admit.
Three years ago, I brought home my first prayer plant. It was gorgeous — deep green leaves with those stunning red veins. Six months later, it looked like a sad, yellow mess. I was convinced it was a goner.
Spoiler alert: it wasn’t. That plant is now thriving on my windowsill, bushier than ever.
If you’re staring at a plant that looks like it’s given up on life — drooping leaves, yellow patches, maybe even some crispy bits — don’t panic. And definitely don’t throw it away yet.
Most “dying” plants aren’t actually dead. They’re just stressed. And with the right diagnosis and a few simple fixes, you can bring them back.
In this guide, I’ll walk you through the exact 6-step process I use to save struggling plants. You’ll learn how to figure out what’s actually wrong, what to do about it, and how to avoid making the same mistakes again. Let’s save your plant.
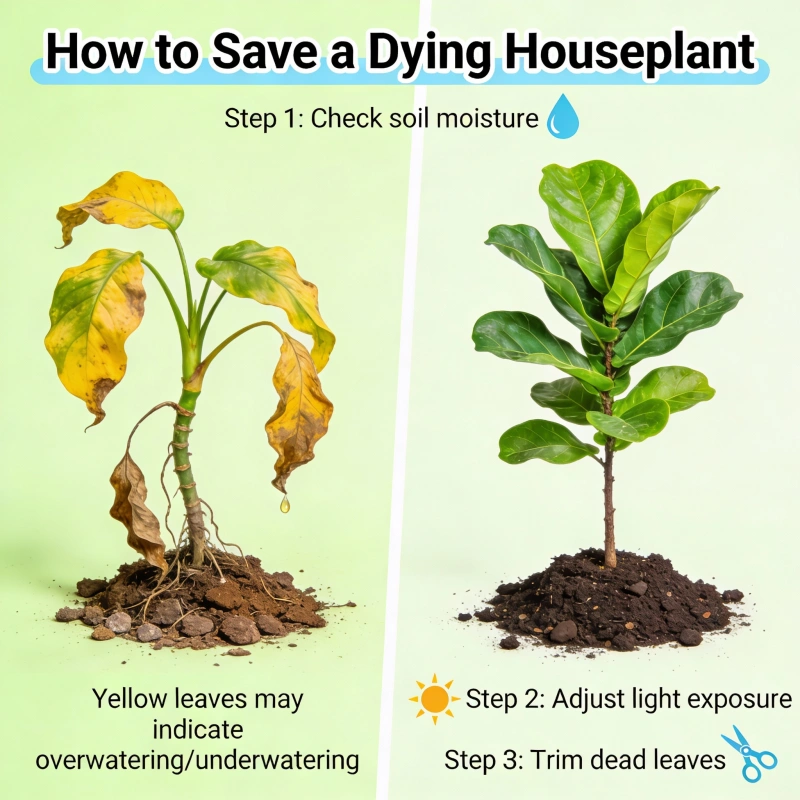
For overwatered plants: stop watering immediately and let the soil dry out completely. For severely underwatered plants: soak the entire pot in water for 15–30 minutes. Next steps: trim dead leaves, adjust lighting, and wait 2–4 weeks for recovery. Most plants are more resilient than you think.
Step 1: Check If Your Plant Can Still Be Saved
Before you do anything else, let’s find out if there’s still hope. Here’s the truth: a plant can look completely dead and still bounce back. I’ve seen it happen dozens of times. The key is checking the right places.
The Stem Test
Grab a small knife or your fingernail and gently scratch the outer layer of a stem.
- Green underneath? Great news — your plant is alive. There’s hope.
- Brown and dry all the way through? That particular stem is dead. But don’t give up yet — check other stems and move to the root test.
The Root Test
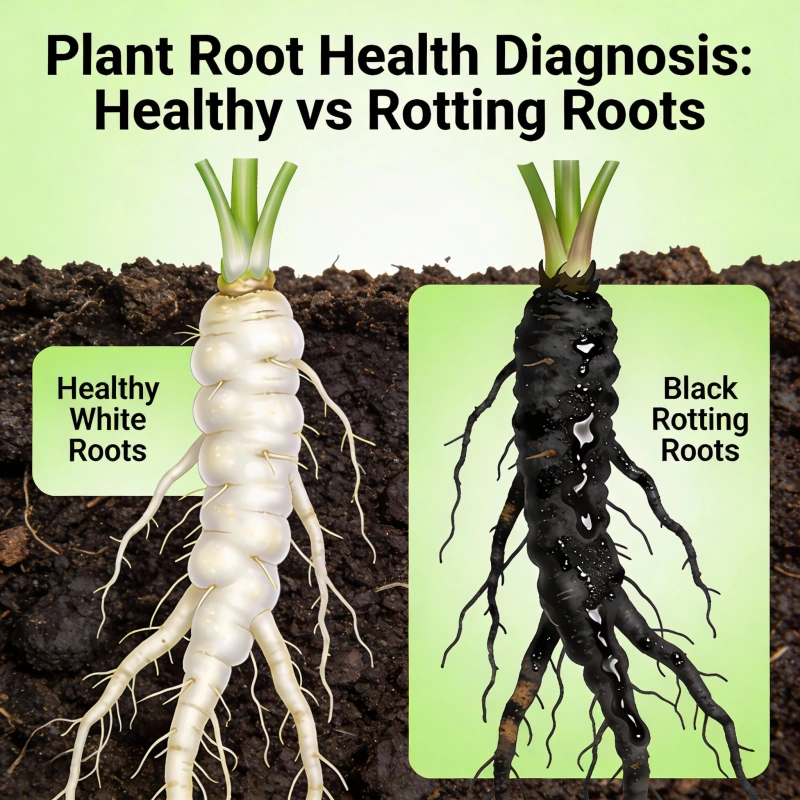
Gently slide your plant out of its pot and look at the roots.
- Healthy roots: white or light tan, firm, and flexible
- Rotting roots: black or dark brown, mushy, and they might smell bad
The Bottom Line
According to horticulture experts at the Royal Horticultural Society, if there’s any green in the stems or any healthy roots remaining, your plant has a fighting chance. Even if all the leaves have dropped, plants can regrow from healthy roots. I’ve personally brought back plants that looked like bare sticks — and they’re now some of my healthiest specimens.
Step 2: Diagnose the Problem
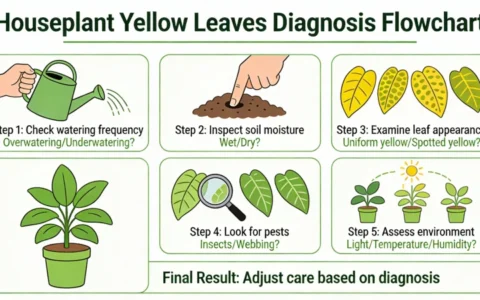
Now that you know your plant can be saved, let’s figure out what’s actually wrong. In my experience, the large majority of dying houseplants come down to one of six issues. Here’s how to identify each one:
Plant Problem Diagnosis Chart
| Problem | Leaf Symptoms | Soil Condition | Other Signs |
|---|---|---|---|
| Overwatering | Yellow, soft, mushy | Wet, may smell bad | Tiny flies, black roots |
| Underwatering | Yellow edges, dry, crispy | Bone dry, pulling from pot edges | Wilting, but perks up after watering |
| Too Little Light | Pale, leggy growth | Normal | Slow growth, leaning toward light |
| Too Much Light | Brown spots, bleached, scorched | Dries out fast | Leaf tips turning white or brown |
| Root Bound | Overall wilting, stunted growth | Normal | Roots coming out of drainage holes |
| Pests | Spots, sticky residue, webbing | May have gnats | Visible bugs on leaves or soil |
The #1 Confusion: Overwatering vs. Underwatering
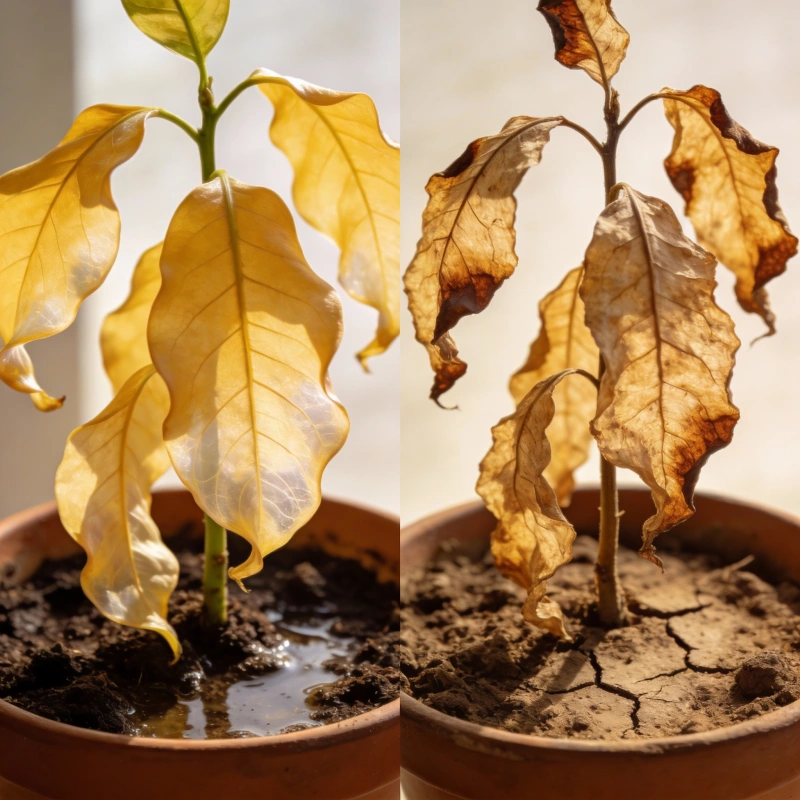
This trips up almost everyone — including me when I first started. Both problems can cause yellow leaves and wilting. But here’s the trick I learned: touch the leaves.
- Overwatered leaves feel soft, limp, and almost mushy
- Underwatered leaves feel dry, crispy, and paper-thin
Another quick method recommended by the University of Maryland Extension: pick up the pot. As plants use water, the potting mix dries out and gets lighter, so periodically lifting the pot — heavy means too much water, light means it needs water — is a reliable weight check.
If your plant’s leaves are turning yellow but you’re not sure why, my detailed guide on why plants turn yellow breaks down all 7 possible causes with a quick diagnosis table.
Dealing with Tiny Flying Bugs
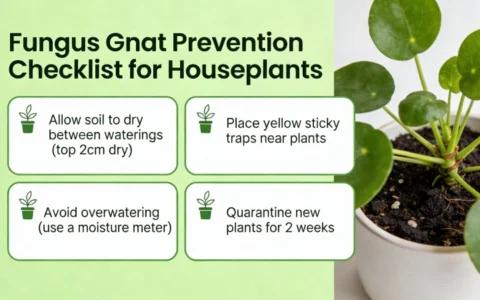
If you see small black flies hovering around your plant’s soil, you’ve got fungus gnats. These little pests thrive in constantly moist soil — so their presence is usually a sign of overwatering. According to the University of Minnesota Extension, fungus gnat larvae feed on organic matter in wet soil and can damage roots over time.
The good news? They’re totally fixable. I’ve written a complete guide on how to get rid of fungus gnats with several proven methods.
Step 3: Take Action Based on the Problem
Now that you know what’s wrong, here’s exactly what to do about it.
If Your Plant Is Overwatered
Mild case (yellow leaves, wet soil):
- Stop watering immediately
- Move to a spot with good air circulation
- Let the top 1–2 inches of soil dry out completely before watering again
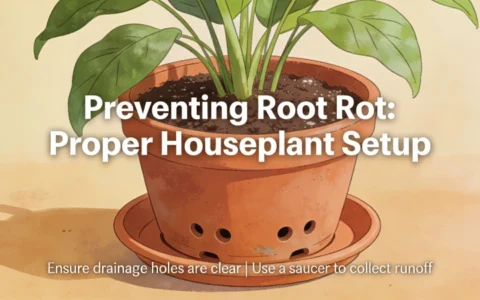
- Make sure your pot has drainage holes
Severe case (mushy roots, bad smell):
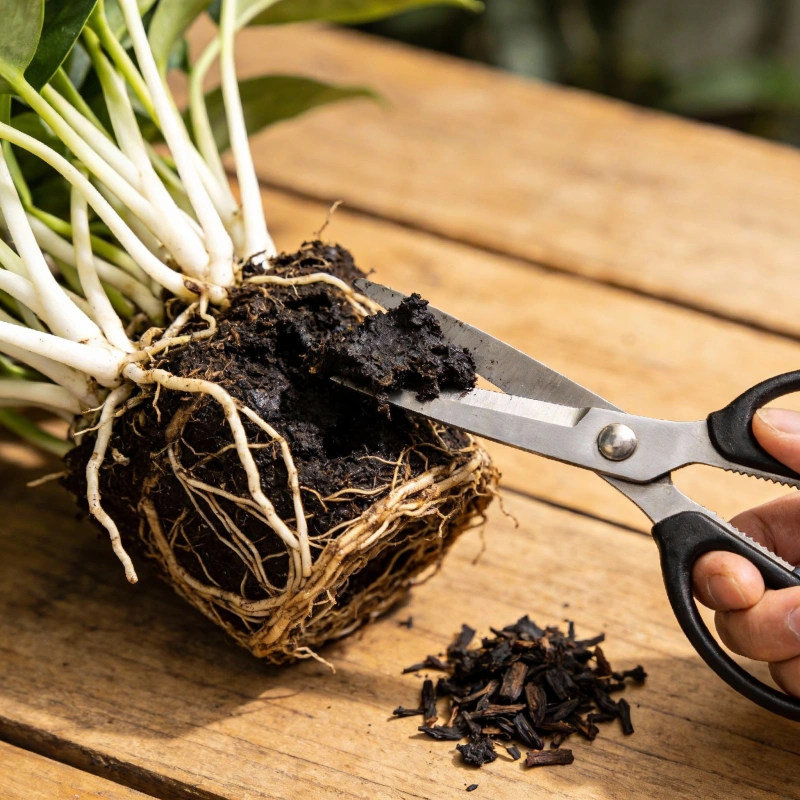
- Remove the plant from its pot
- Gently shake off the old, wet soil
- Using clean scissors, cut away any black, mushy roots
- Let the roots air dry for a few hours
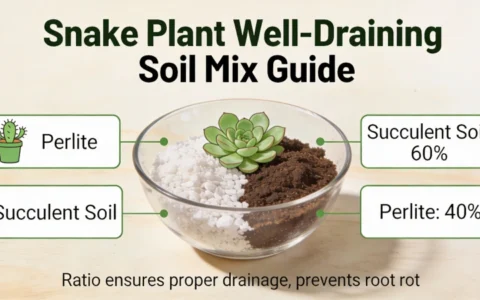
- Repot in fresh, well-draining potting mix
- Choose a pot with drainage holes — slightly smaller is better than too big
If the roots are mostly black and the soil smells sour, you’re dealing with full-blown root rot — my dedicated root rot treatment guide covers the complete process, including the hydrogen-peroxide soak and how to take backup cuttings when more than half the roots are gone.
If Your Plant Is Underwatered
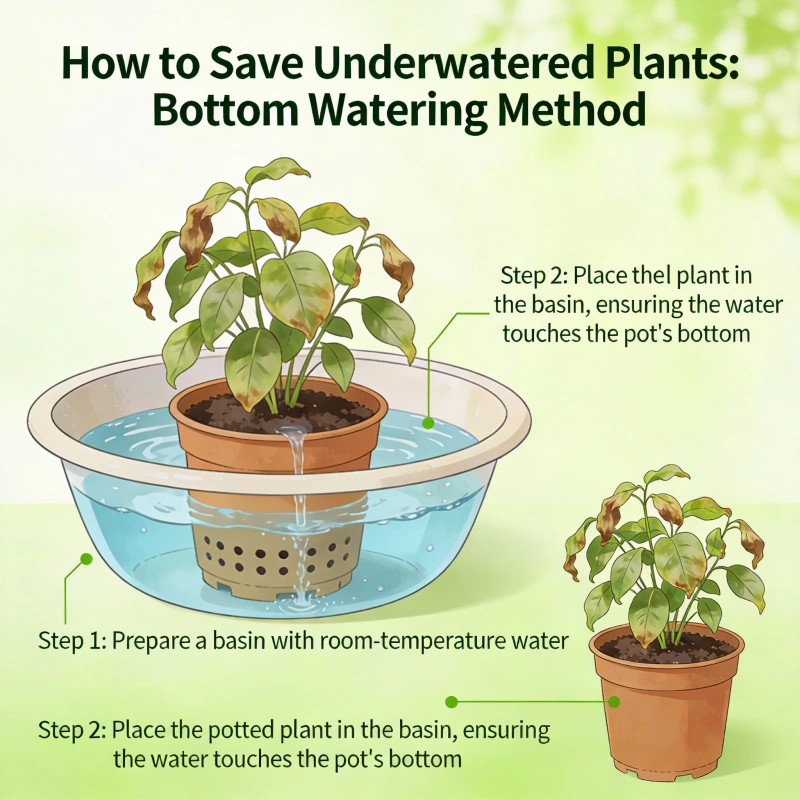
The soak method:
- Fill a sink or basin with a few inches of room-temperature water
- Place the entire pot in the water
- Let it sit for 15–30 minutes so the soil can absorb water from the bottom
- Remove and let it drain completely
Why bottom watering? When soil gets extremely dry, it becomes hydrophobic — water just runs down the sides and out the drainage holes without actually soaking in. Bottom watering solves this problem.
If It’s a Light Problem
Not enough light: move your plant closer to a window. East-facing windows are great for most houseplants — bright but not too intense.
Too much light: move away from direct sun or use a sheer curtain to filter the light.
Here’s a tip I wish someone had told me earlier: if the room is too dark to comfortably read a book without turning on a lamp, it’s probably too dark for most plants.
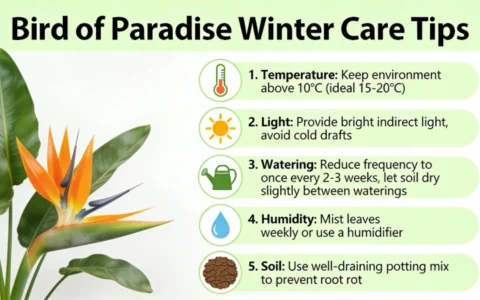
Keep in mind that light requirements vary a lot between species. For example, a bird of paradise needs bright, direct light to thrive, while a pothos can happily handle low-light corners.
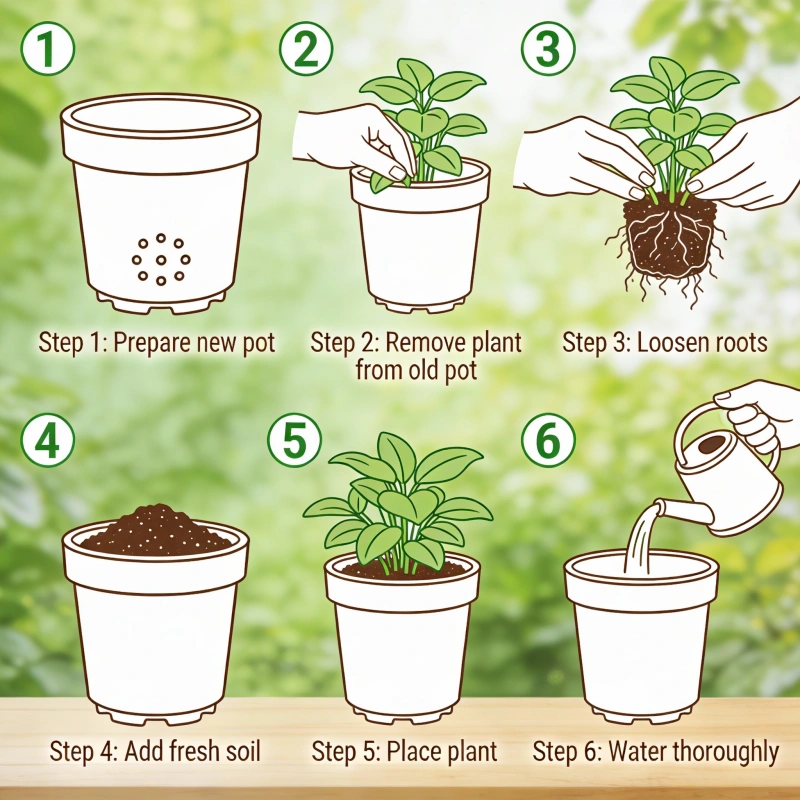
If Your Plant Needs Repotting
- Choose a new pot only 1–2 inches larger than the current one
- Use fresh, well-draining potting mix
- Don’t fertilize for at least 2 weeks after repotting
Step 4: Prune and Clean Up
Once you’ve addressed the root cause, it’s time to tidy up.
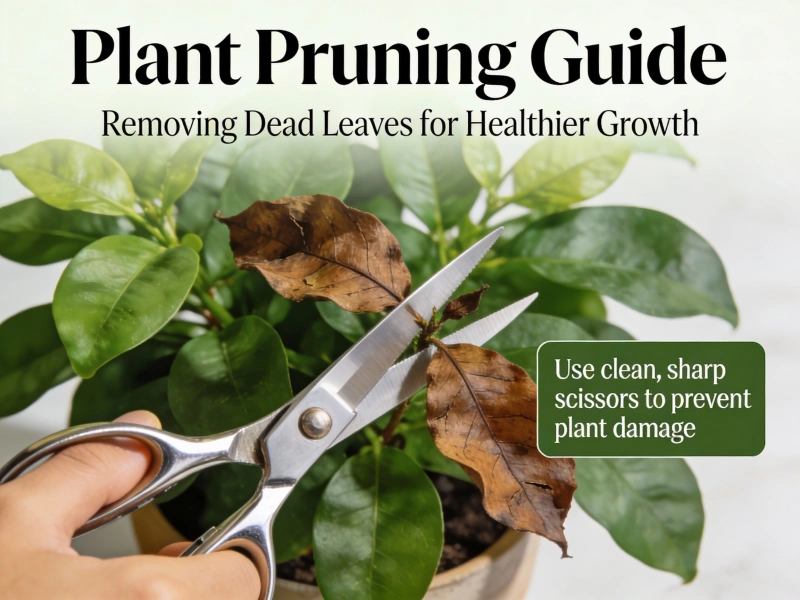
Remove Dead Leaves
Using clean scissors or pruning shears, cut off any leaves that are:
- Completely brown and crispy
- Totally yellow and mushy
- Heavily damaged or diseased
Important: don’t remove leaves that are only slightly yellow or have minor damage. They’re still photosynthesizing and helping your plant recover.
Trim Dead Stems
If stems are completely dead (brown, brittle, no green inside), cut them back to about 2 inches above the soil line. Leave some stem — new growth can emerge from it.
Don’t Fertilize Yet
This is crucial: do not fertilize a sick plant. I made this mistake early on. I thought my struggling plant needed a nutrient boost, so I gave it fertilizer. It got worse. Fertilizing a stressed plant is like making someone run a marathon when they have the flu. Wait until you see new, healthy growth before even thinking about plant food.
Step 5: Adjust the Environment
Your plant’s recovery depends on the right conditions.
Temperature
Most houseplants prefer temperatures between 65–75°F (18–24°C). Avoid placing plants:
- Next to heating vents or radiators
- In drafty areas near doors or windows
- Near air conditioning units
Humidity
This is often overlooked, especially in winter when indoor heating dries out the air. Signs your plant needs more humidity:
- Brown, crispy leaf edges
- Leaves curling inward
- New leaves emerging wrinkled or misshapen
Easy ways to increase humidity:
- Humidity tray: place the pot on a tray filled with pebbles and water (pot sits on pebbles, not in water)
- Group plants together: they create their own humid microclimate
- Move to the bathroom: if it gets enough light
- Use a humidifier: the most reliable option
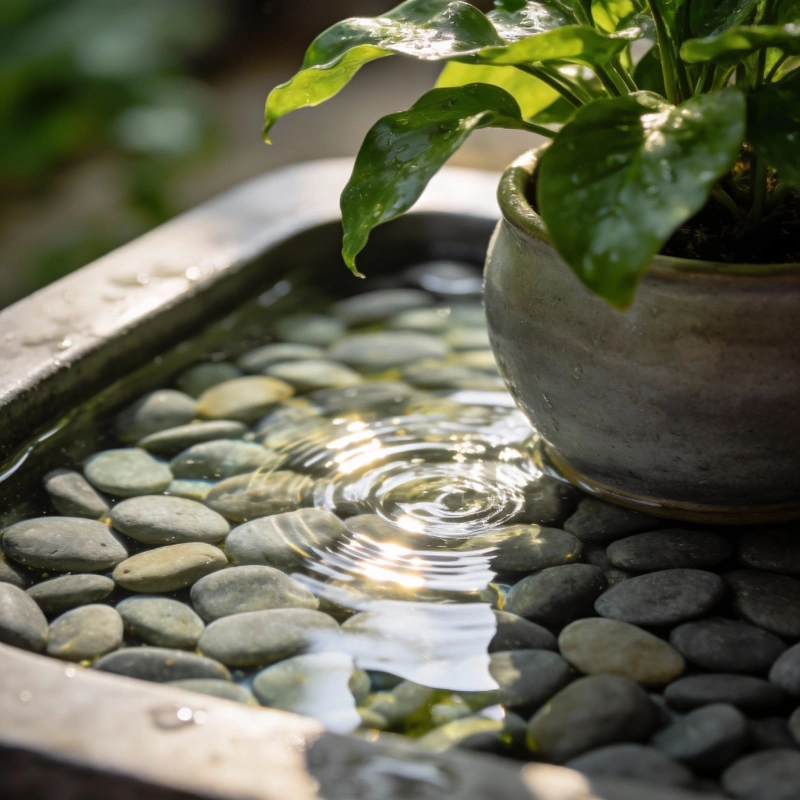
Tropical plants like the prayer plant are especially sensitive to low humidity. If you have one, it’s worth paying extra attention to this.
My Story: Saving a Dying Prayer Plant
Let me tell you about the plant that taught me everything I know about rescue missions.
The Beginning
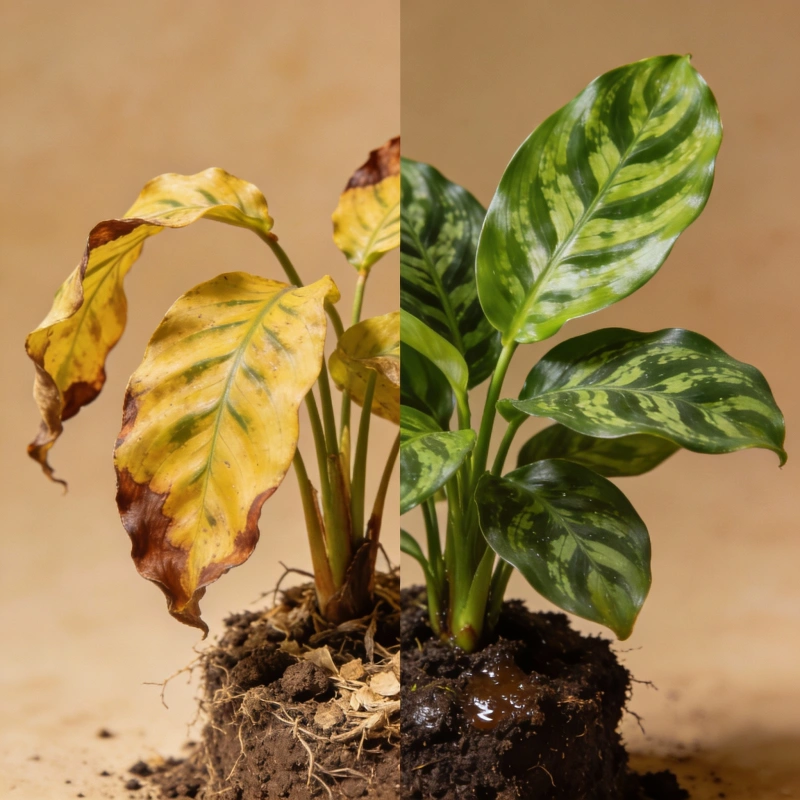
December 2024. My two-year-old prayer plant was in trouble. I’d had this plant since I started my houseplant journey — one of my favorites, with those stunning leaves that fold up at night like hands in prayer. But suddenly, leaves started turning yellow. Then brown. Then falling off.
My Mistake
I panicked and did what most beginners do: I assumed it needed more water. Big mistake. I increased my watering frequency. The yellowing got worse. Then I noticed tiny flies buzzing around the soil. Within a week, the plant had lost about half its leaves.
The Diagnosis
Finally, I decided to check the roots. When I pulled the plant out of its pot, the smell hit me first — musty and sour. The roots were black and mushy. Classic root rot. My “helpful” extra watering had been drowning the plant.
What I Did to Save It
- Root surgery: I cut away about a third of the roots — everything that was black or squishy
- Fresh start: repotted in completely new, well-draining soil
- Pest control: set up yellow sticky traps to catch the fungus gnats
- Better location: moved to a spot with brighter indirect light
- Changed my watering: switched to bottom watering and only when the top inch of soil was dry
The Result
Weeks 1–2: nothing. Actually, it lost two more leaves. I almost threw it out. Week 3: I spotted a tiny green nub emerging from the center of the plant — a new leaf! Week 6: the plant had put out three new leaves and looked healthier than it had in months. Today, that same prayer plant is one of the fullest, healthiest plants in my collection. It’s proof that even when things look hopeless, plants can surprise you.
What I Learned
Gardening experts say recovery can take up to a month before you see improvement. My experience confirmed that. The hardest part wasn’t the work — it was the waiting. If your plant is struggling, give it time. Don’t keep changing things. Set up the right conditions and let nature do its thing.
Step 6: Be Patient and Monitor
This might be the hardest step. After you’ve done everything right, you need to wait. Plant recovery takes time — typically 2–4 weeks to see improvement, and up to a month for significant new growth.
Signs of Recovery
- New leaves emerging
- Existing leaves perking up
- Stems feeling firmer
- Overall color improving
What NOT to Do During Recovery
- Don’t keep moving the plant around — plants need time to adjust
- Don’t fertilize — wait until you see new growth
- Don’t overwater “to help it along” — stick to your plan
- Don’t repot again — one change at a time
When to Accept It’s Over
Sometimes, despite our best efforts, a plant can’t be saved. It might be time to let go if:
- A month has passed with zero new growth
- All stems are completely dry and brittle (no green inside)
- All roots are rotted with no healthy sections remaining
- The plant has no viable nodes or growth points left
If your plant doesn’t make it, don’t be too hard on yourself. Every plant person has lost a few. Consider composting it — at least it can feed your other plants.
How to Prevent This From Happening Again
The best way to save a dying plant? Don’t let it get to that point.
Master the Watering Basics
The finger test: stick your finger 1–2 inches into the soil. If it’s dry, water. If it’s moist, wait. Water thoroughly: when you do water, water until it drains from the bottom, then don’t water again until the soil dries out. Adjust for seasons: plants need less water in winter when growth slows down.
Know Your Plant
Before you bring a plant home, spend 5 minutes learning what it needs. A cactus and a fern have completely different requirements — treating them the same is a recipe for disaster.
Regular Check-Ins
Every time you water, take 30 seconds to actually look at your plant: any yellowing leaves? New growth happening? Pests on leaves or soil? Soil condition normal? Catching problems early makes them much easier to fix.
Watch: How to Diagnose and Save a Dying Plant
This video gives a great visual walkthrough of diagnosing common plant problems:
Frequently Asked Questions
How long does it take for a dying plant to recover?
In my experience, you should see signs of improvement within 2–4 weeks if you’ve addressed the problem correctly. Full recovery can take 1–2 months. The key is patience — don’t keep changing your approach. Give the plant time to respond.
Can I fertilize my sick plant to help it recover?
No. Fertilizing a stressed plant puts additional burden on an already struggling system. Wait until your plant is actively growing new leaves before introducing any fertilizer. This usually means waiting at least a month after the initial recovery signs.
My plant lost all its leaves. Is it dead?
Not necessarily. If the stems still have green inside (do the scratch test) and the roots look healthy, your plant can regrow. Cut back dead stems to about 2 inches above the soil, provide proper care, and wait. Many plants can regenerate from just roots and a bit of stem.
Should I repot my dying plant?
Only if there’s a specific reason to — like root rot that requires removing bad soil, or the plant is severely root-bound. Otherwise, repotting adds stress to an already stressed plant. Address the immediate problem first, then consider repotting once the plant stabilizes.
Final Thoughts
Watching a struggling plant come back to life is one of the most satisfying experiences in indoor gardening. Remember: most plants are tougher than they look. As long as there’s some green in the stems or healthy roots remaining, there’s hope.
Next time your plant looks rough, don’t panic. Diagnose the problem, take targeted action, and then give it time. You might be surprised what comes back. Good luck with your plant rescue! 🌱
This article was created by a professional team. AI tools were used during the research and writing process to enhance efficiency and quality. All information has undergone manual verification and editing to ensure accuracy and practicality. We are committed to providing readers with objective and valuable content.
Publisher::Spring Mei,Please indicate the source when reposting:https://gardeningtoolsgarden.com/how-to-save-a-dying-plant/