Last updated: May 2026 · Written from 18 months of hands-on experience — from a dying, root-rotted aloe to four thriving plants.
I almost killed my first aloe vera plant. When my friend handed me that sad, yellowing plant before moving away, she said, “Aloe is impossible to kill. You’ll be fine.” Two weeks later it was worse — the leaves softer, droopier, and browning at the base. Sound familiar? If you’ve wondered why this so-called “unkillable plant” keeps dying on you, you’re not alone. Overwatering is the number one killer of aloe vera — and that was exactly my first mistake.
The good news: after 18 months of trial, error, and finally success, I turned that dying plant into four thriving aloes (it’s a succulent, so the rules are simple once you know them). Below I’ll share everything I learned — how to water, the light it actually wants, how to fix common problems, and how to grow your own aloe family from pups. Whether you’re a beginner or trying to save a struggling plant, these tips work. Let’s dive in.
Quick Answer: Aloe Vera Care Basics
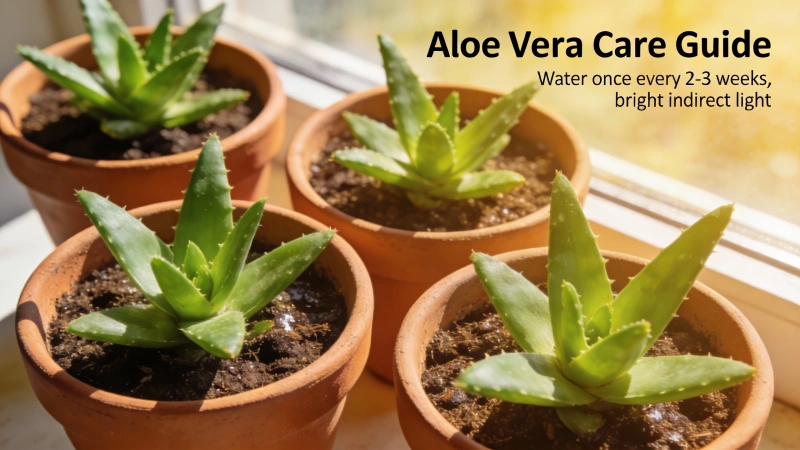
- Water: only when the soil is completely dry (every 2–3 weeks in summer, every 4–5 weeks in winter)
- Light: bright light with a few hours of direct sun — but acclimate gradually and shield from harsh summer midday sun
- Soil: fast-draining cactus mix in a pot with drainage holes
- Temperature: 55–80°F (13–27°C) — normal room temperature is perfect
Below, I’ll share my personal experience and detailed tips for each of these areas.
Aloe Vera Care at a Glance
| Care Factor | What to Do | Common Mistake |
|---|---|---|
| Watering | Wait until soil is bone dry, then soak | Watering on a fixed schedule |
| Light | Bright light, incl. some direct sun | Too-dim “indirect” spots; or full sun overnight |
| Soil | Cactus mix + perlite (gritty) | Regular potting soil |
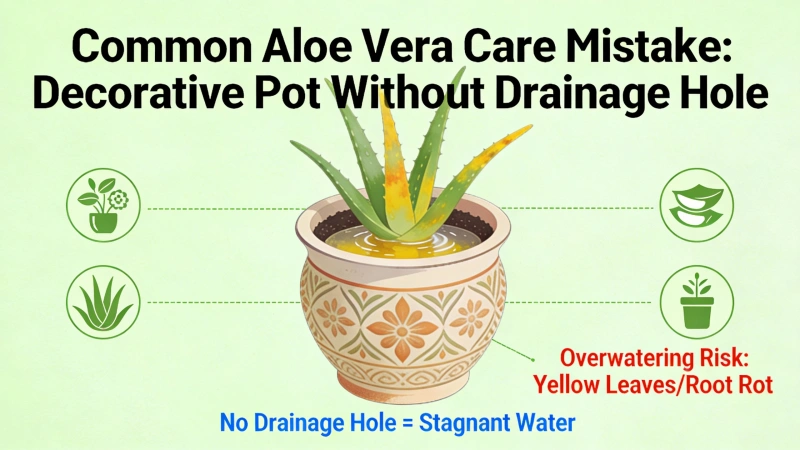
| Pot | Terracotta with drainage holes | Decorative pots without holes |
| Airflow | Good ventilation; keep leaves dry | Stuffy spot + water sitting on leaves |
| Fertilizer | Once in spring (half-strength) | Monthly feeding |
Why Aloe Behaves the Way It Does (the 30-Second Science)
One fact makes every rule below click: aloe is a desert succulent that stores water in its thick leaves and, like other succulents, runs on Crassulacean Acid Metabolism (CAM) — it keeps its leaf pores closed during the hot day to save water and opens them at night. That’s the real reason it shrugs off drought, why it rots so fast in soggy soil, and why wetting the leaves does nothing useful. Treat it like what it is — a plant built to sip, not gulp — and you’re 90% of the way there.
Step 1: Find the Right Light (It’s Trickier Than You Think)
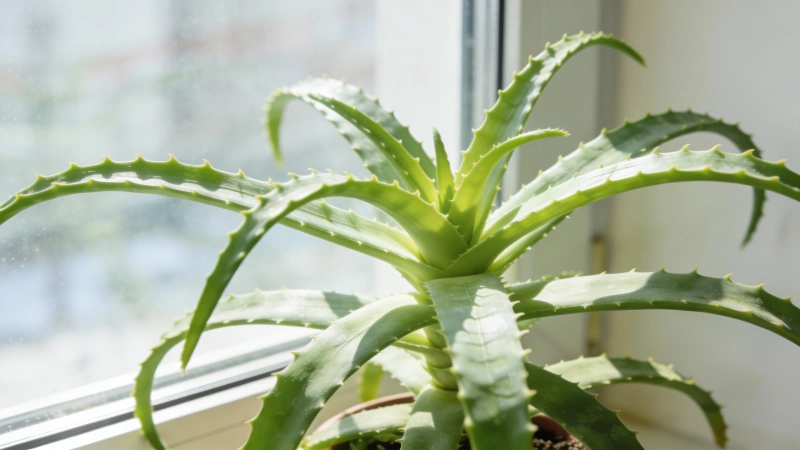
Aloe loves light — lots of it. Give it the brightest spot you have: a south- or west-facing window where it gets several hours of direct sun is ideal. The common advice to keep aloe in “bright, indirect light” a foot or two back from the glass is usually too dim — and that’s exactly what produces the pale, stretched, leggy growth people complain about. The Royal Horticultural Society notes aloe does best in bright light but appreciates protection from the most intense summer afternoon sun, and our light requirements guide helps you judge what your window actually offers.
The one real catch is acclimation. I learned it the hard way — I moved a store-bought aloe straight onto my California patio in mid-summer, and within three days the leaves had brown, crispy sunburn spots. A plant grown in lower light needs 7–10 days to adjust to stronger sun. So aloe wants plenty of sun; it just can’t get there overnight.
How to tell the light is wrong: too little light shows as pale leaves, stretching toward the window, and thin leggy growth; too much (or too sudden) light shows as red-brown color, dry crispy patches, and bleached spots. Best practice: indoors, a south/west window; when moving outdoors, increase exposure gradually over a few days at a time; and skip dim north-facing windows.
Step 2: Master the Art of Watering (This Is Where Most People Fail)
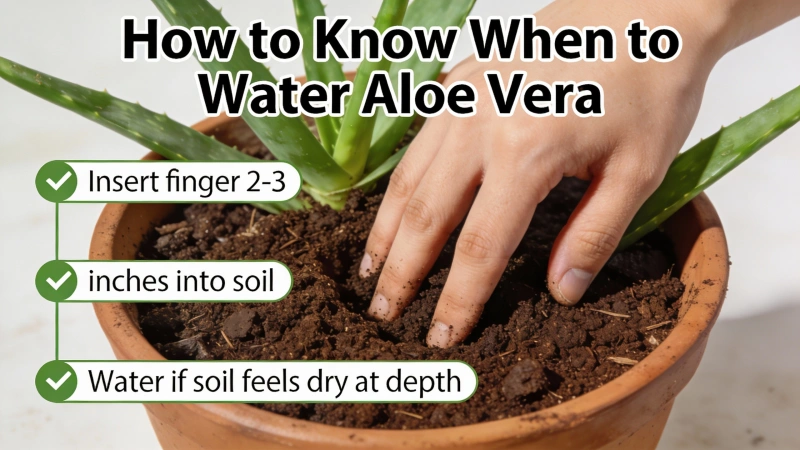
This is the most important step — about 90% of aloe problems trace back to watering. My failure story: at first I watered every Saturday like clockwork, thinking “regular watering is good for plants.” Within a month the leaves were soft and mushy and the bottom ones yellow, and when I unpotted it the roots were brown and slimy — classic root rot. It’s the single most common way aloes die: South Dakota State University Extension notes root rot in aloe comes from overwatering, with no cure once it sets in — it can be fatal if not caught early.
The Right Way to Water
Follow the “soak and dry” rhythm — don’t water until the soil is dry, then water thoroughly: first test by pushing a finger 2 inches in (still moist? wait a few more days; bone dry? water); then water deeply until it runs from the drainage holes and empty the saucer; and adjust by season — spring/summer every 2–3 weeks, fall/winter every 4–5 weeks. The single best habit is to let the soil decide, not the calendar. Warmth, strong light, and good airflow all dry the pot faster, so the same plant drinks far more in July than in January (our watering schedules guide explains how to read those cues).
| Season | Frequency | Notes |
|---|---|---|
| Spring | Every 2–3 weeks | Growth begins — gradually increase |
| Summer | Every 2 weeks | May need more in extreme heat |
| Fall | Every 3–4 weeks | Start reducing frequency |
| Winter | Every 4–5 weeks | Dormant — water sparingly |
If you think you’ve already gone too far — soft, mushy leaves and a soggy pot — don’t wait. My step-by-step guide on how to treat root rot and save a dying plant walks through checking the roots and rescuing one before it’s beyond help. (One reassuring note from rescuing my own: aloe is forgiving here — cut away the rotten roots, let the plant callus, and it often re-roots from what’s left.)
Step 3: Choose the Right Soil and Pot
Soil Mix
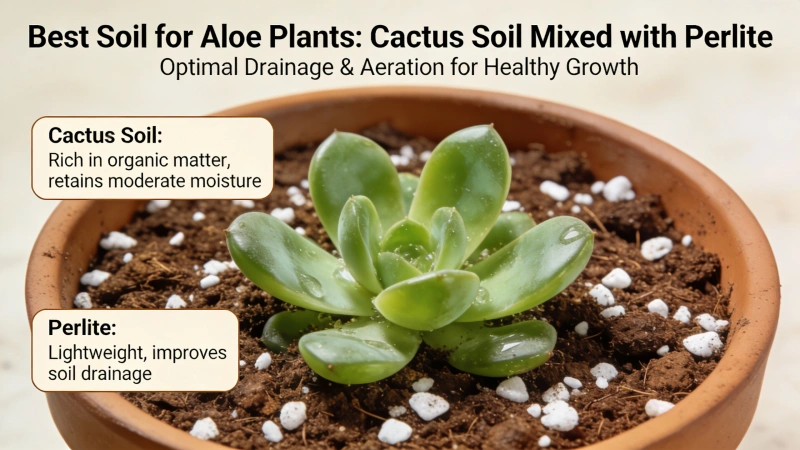
Aloe needs fast-draining soil. My recipe is simple: 50% cactus/succulent mix + 50% perlite or coarse sand. If you’d rather blend from garden materials, a documented all-purpose ratio is roughly humus : garden soil : coarse sand = 4 : 4 : 2 — just lean grittier if your aloe has ever rotted. Advanced growers go further still, using a mostly inorganic gritty mix (pumice, akadama) that’s almost impossible to overwater. Whichever you choose, drainage is the point: aloe is native to sandy, arid ground, its roots evolved for dryness, and SDSU Extension warns that aloe in soil that stays wet is highly prone to root rot. Our soil & fertilizer guide covers the components.
Pot Selection
Best choice: a terracotta pot with drainage holes — the porous clay helps the soil dry faster, it’s heavy enough to resist tipping, and the hole is non-negotiable. Avoid: plastic pots (hold moisture too long), decorative pots without holes, and oversized pots (excess soil stays wet). I tested this myself — overwatered aloes in terracotta dried about 2 days faster on average than the same in plastic, and recovered far better. Our pots & planters guide goes deeper.
Step 4: Keep Temperature Steady
Ideal range: 55–80°F (13–27°C), and most homes sit there naturally, so your aloe is comfortable wherever you are. Avoid cold drafts near winter windows, direct airflow from AC or heating vents, and outdoor temperatures below 50°F (10°C). If you’re in USDA Zone 10 or warmer you can grow aloe outdoors year-round; for most of us it’s happiest as a houseplant.
Step 5: Fertilize Sparingly (Less Is More)
Aloe isn’t a hungry plant — over-fertilizing causes more trouble than under-fertilizing. My approach: feed once in spring only, with a succulent fertilizer diluted to half strength, and 1–2 times a year is plenty. When you do feed, aloe appreciates a balanced feed that also supplies a few micronutrients (a well-rotted organic option works nicely) — but keep it light. Signs of over-fertilizing are brown leaf edges, root burn, and distorted growth. Can you skip feeding entirely? Yes — aloe evolved in nutrient-poor desert soil and can thrive for years with none.
My Real Experience: From Dying Plant to Thriving Collection
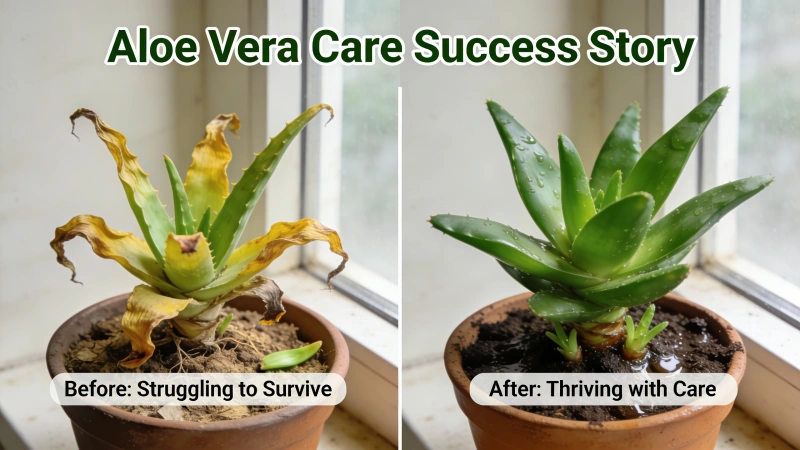
The Starting Point (Spring 2023)
My friend was moving cross-country and handed me her neglected aloe. It looked rough: 5 leaves, 3 of them yellow and mushy, the whole plant leaning sideways in a plastic pot with no drainage hole. “It’s fine, aloe is indestructible,” she said. I wasn’t so sure.
What I Found Wrong
When I unpotted it, the problems were clear: about 30% of the roots were rotted (brown-black and slimy), the soil at the bottom was still wet even though the surface felt dry, and the pot had zero drainage. A textbook overwatering setup.
My Rescue Plan
I trimmed away all the rotten roots with clean scissors, left the bare plant in a shaded spot for 3 days to callus over, mixed fresh cactus soil with 50% perlite, moved it into terracotta with a drainage hole, waited a full 10 days before watering, and set it near a south-facing window out of harsh direct sun.
The Results
By week 4 there was new healthy growth; by month 6 the leaf count had gone from 5 to 9; by month 12 the first pups appeared; and by month 18 I’d separated 4 new plants, 3 of which survived (a 75% success rate). My biggest lesson: aloe really is drought-tolerant, so now I’d rather let it get a little thirsty than risk overwatering — when I’m unsure, I wait a few more days. That one mindset shift made all the difference.
This experience also helped me rescue other struggling houseplants later. If you have a dracaena that’s seen better days, my approach was similar — see how I saved my dying Dracaena.
Troubleshooting: What’s Wrong With My Aloe?
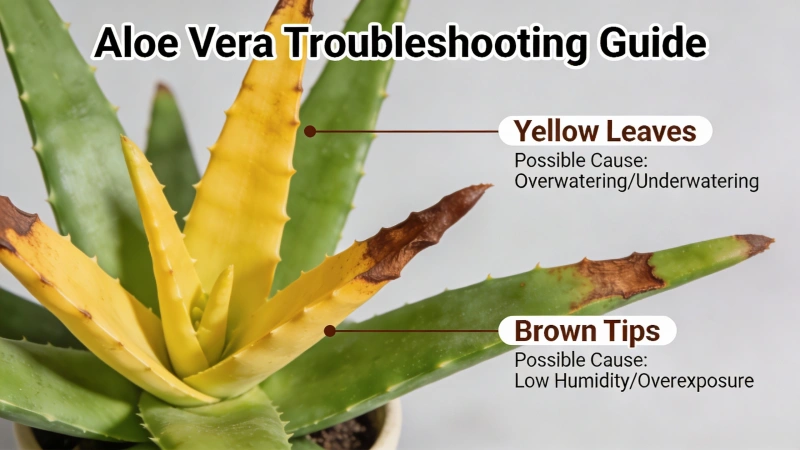
Here’s a quick diagnostic guide based on what I’ve learned:
| Symptom | Likely Cause | Fix |
|---|---|---|
| Soft, yellow leaves | Overwatering | Check roots; repot if needed |
| Brown, crispy tips | Underwatering or heat | Water more; move from heat source |
| Red/brown patches | Sunburn (often after a sudden move) | Shade from harsh sun; acclimate slowly |
| Pale, stretching leaves | Not enough light | Move to a brighter spot |
| Plant tipping over | Root rot or light pot | Check roots; use a heavier pot |
| Sunken/soft spots, leaf spots | Fungal/bacterial disease (see below) | Remove affected leaves; improve airflow |
| Bottom leaves dying | Normal aging | Remove dead leaves; don’t worry |
For soft, yellow leaves specifically, our broader hub on why a plant turns yellow helps you tell watering issues apart from other causes, and brown tips covers the crispy-edge pattern.
5 Mistakes I Made (So You Don’t Have To)
- Watering on a schedule. ❌ “I water every Saturday.” ✅ Water only when the soil is completely dry.
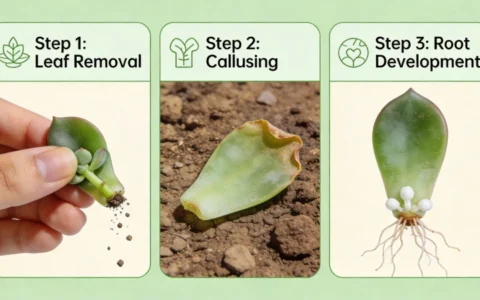
- Trying to propagate from a single leaf. ❌ Cutting a leaf and sticking it in soil. ✅ Wait for pups to form and separate those instead.
- Moving the plant too suddenly. ❌ Indoor plant → direct outdoor sun overnight. ✅ Take 7–10 days to ramp up light.
- Adding rocks “for drainage.” ❌ A myth — rocks just steal root space. ✅ A good drainage hole is all you need.
- Same watering routine in winter. ❌ Every 2 weeks year-round. ✅ Cut frequency in half during dormancy.
How to Propagate Aloe Vera (Free Plants!)
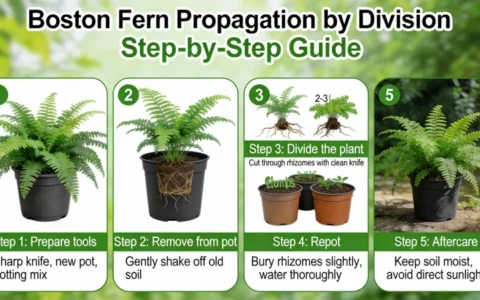
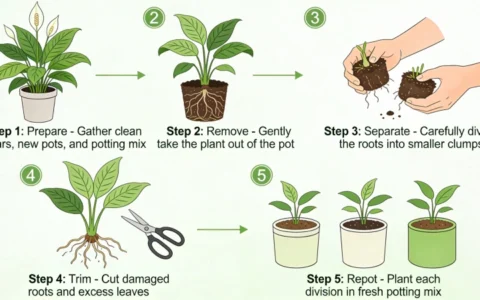
The easiest way to get more aloe? Let the mother plant do the work. Aloe naturally produces baby plants called “pups” or “offsets” at the base — genetic clones of the parent with the highest success rate (our propagation methods guide covers the general technique).
When to Separate
Wait until pups are at least 4–6 inches tall, or about one-fifth the size of the mother plant, and do it in spring or summer.
Step-by-Step Propagation
- Gently remove the entire plant from its pot
- Brush away soil to see the root connections
- Find where the pup joins the mother plant
- Use a clean, sharp knife to cut the connection
- Let the cut end dry 2–3 days to form a callus
- Plant in fresh, well-draining soil
- Wait 7–10 days before the first watering
I separated 4 pups from my mother plant and 3 survived (75%). The one that failed? I watered it too soon — the cut hadn’t healed, and it rotted. The callus step is the whole game.
Using Aloe Vera Gel: The Bonus Benefits
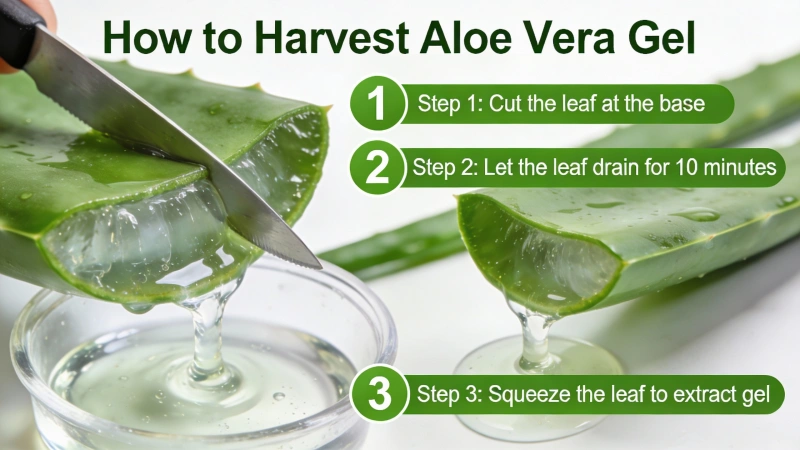
One of the best things about growing aloe is the free skincare. To harvest, choose a mature outer leaf, cut it close to the base, slice it lengthwise, and scoop out the clear inner gel with a spoon. Common topical uses include cooling relief for burns and sunburn, light moisturizing, and soothing minor cuts. According to the Mayo Clinic, aloe vera gel may help speed healing of first- and second-degree burns and reduce skin inflammation.
Love Aloe? Try These Low-Maintenance Plants Too
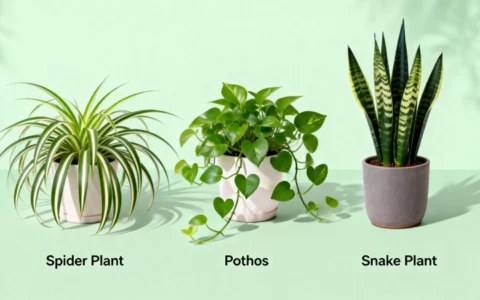
If you’re drawn to aloe’s easy-care nature, you might also enjoy a few plants that follow the very same rules — water only when bone dry, give good drainage, and otherwise leave them alone. The snake plant is even more drought- and shade-tolerant (see my snake plant care guide); the near-indestructible ZZ plant, the long-lived jade plant (another succulent, like aloe), and the architectural Dracaena round out the list. The common thread? Every one of them would rather be underwatered than overwatered.
Dealing With Pests and Disease
Aloe is generally tough, but problems can happen. Pests to watch for are mealybugs (white cottony masses), scale (brown bumps), and spider mites (fine webbing). For natural treatment, spray the leaves with water to knock pests off, wipe them with a cotton swab dipped in rubbing alcohol, or use a diluted dish-soap spray. Prevention is mostly cultural: ensure good air circulation, don’t let water sit on the leaves, and quarantine new plants for 2 weeks before placing them near others.
One pest that’s easy to miss hides below the soil: if an aloe simply won’t grow despite correct light and watering, check the roots when you next repot for root mealybugs (tiny white insects and a white powdery residue) — a stalled plant isn’t always a thirsty one.
Aloe can also get fungal and bacterial diseases — things like anthracnose, leaf spot, leaf blight, southern blight, and bacterial soft rot — which tend to take hold when leaves stay wet, water splashes around, airflow is poor, or the soil is kept too soggy. Manage them by keeping the foliage dry, improving ventilation, promptly removing and discarding affected leaves to limit spread, and not crowding plants together. Our pests & diseases guide covers identification in more depth.
Also worth knowing: tiny flies hovering around the soil are usually fungus gnats, a sign you’re watering too often — they’re far less likely once you’ve dialed in aloe’s “let it dry out” routine.
Watch: Aloe Vera Care Visual Guide
Sometimes it’s easier to see care techniques in action. This video covers the essentials:
Frequently Asked Questions
How often should I water my aloe vera?
There’s no fixed schedule — it depends on your environment. The rule is simple: wait until the soil is completely dry, which typically means every 2–3 weeks in spring/summer and every 4–5 weeks in fall/winter. Always check the soil first by pushing a finger 2 inches deep.
Why are my aloe leaves turning brown?
Brown leaves usually mean overwatering or sunburn. If they’re soft and mushy, it’s likely too much water — check the roots for rot. If they’re dry and crispy with brown patches, it’s probably sun damage. Move the plant out of harsh sun and adjust your watering.
Will my aloe vera flower?
Yes, but rarely indoors. Aloe needs intense sunlight and ideal conditions to bloom — yellow or orange tubular flowers on a tall spike. Outdoor plants in warm climates flower more readily. Don’t worry if yours never blooms; it’s still perfectly healthy.
Is aloe vera toxic to cats and dogs?
Yes. According to the ASPCA, aloe vera is toxic to both cats and dogs. If ingested, it can cause vomiting, diarrhea, and other symptoms. Keep your aloe on high shelves or in rooms your pets can’t access.
Why isn’t my aloe producing pups (baby plants)?
It might not be mature enough — aloe usually needs to be a few years old before producing offsets. Make sure it’s getting enough light and isn’t stressed, and with patience the pups will appear.
Can I grow aloe vera from a single leaf cutting?
Technically possible, but the success rate is very low. Aloe leaves are full of moisture and tend to rot before they root. The far better method is propagating from pups — the baby plants at the base — which root reliably.
Key Takeaways
- Less water, more light, good drainage — that triad is 90% of aloe care.
- Water only when bone dry: overwatering and root rot are the #1 killers; when unsure, wait.
- Give real light: a sunny window with some direct sun — “indirect” is usually too dim — but acclimate gradually.
- Drainage hole, gritty mix: terracotta beats plastic; skip the rocks-in-the-bottom myth.
- Barely feed it: once in spring at half strength, or not at all.
- Propagate from pups, not leaves; let cuts callus before planting.
- Mind safety: toxic to cats and dogs; gel is topical, not for eating.
From nearly killing my first aloe to four thriving plants, this taught me that even “easy” plants ask you to understand their needs. Remember the big one — aloe is a desert plant, more afraid of too much water than too little — and when you’re unsure whether to water, wait a few more days. Get it right and aloe is hugely rewarding (with plenty of free gel for sunburns). 🌿
This article was created by a professional team. AI tools were used during the research and writing process to enhance efficiency and quality. All information has undergone manual verification and editing to ensure accuracy and practicality. We are committed to providing readers with objective and valuable content.
Publisher::Spring Mei,Please indicate the source when reposting:https://gardeningtoolsgarden.com/how-to-take-care-of-an-aloe-vera-plant/