Last updated: May 2026 · Written from 5+ years of hands-on experience — from killing my first three snake plants to caring for 8 thriving ones.
Here’s the truth: snake plants are incredibly forgiving — but only once you understand one key principle. This isn’t another generic care sheet. Over 5+ years I’ve gone from killing my first three plants to keeping eight thriving ones, and below I’ve paired that hands-on experience with established guidance from university extensions: honest answers, the real mistakes I made, exact seasonal watering, specific light distances, a full problem-diagnosis section, and my complete recovery and propagation stories.
Quick Health Check: Is Your Snake Plant Happy?
Before you dive in, take 30 seconds to assess your plant’s current condition:
1. How often do you water?
- Weekly or more often → 🚨 stop! You’re overwatering — jump to the watering guide below
- Every 2–4 weeks → ✅ good start — you’re on the right track
- Monthly or less → ✅ perfect! — you understand snake plants
2. Where is your plant located?
- Dark corner, no windows → ⚠️ needs more light — check the light section
- Near a bright window (no direct sun) → ✅ ideal spot
- Direct hot sun all day → ⚠️ burn risk — move it back a few feet
3. What do the leaves look like?
- Yellow, soft, or mushy → 🚨 likely overwatered — see the root rot treatment below
- Firm, upright, and green → ✅ healthy — keep doing what you’re doing
- Wrinkled or droopy → 💧 needs water — rare, but it happens
All ✅ = you’re doing great. 1–2 ⚠️ = minor tweaks needed; focus on those sections. Any 🚨 = your plant needs attention now; skip to the relevant fix.
Snake Plant Basics: What You Need to Know
Plant Identity & Classification
The snake plant’s scientific name is Dracaena trifasciata, though you’ll still see it sold as Sansevieria (its name until the 2017 reclassification) — both are widely accepted, so don’t worry if you see either. You might also hear Mother-in-Law’s Tongue, Viper’s Bowstring Hemp, or Saint George’s Sword. It belongs to the Asparagaceae family and comes from the tropical regions of West Africa, where it grows in rocky, dry areas with seasonal rainfall — which is exactly why it’s so drought-tolerant indoors. (Since it’s now a Dracaena, its care overlaps closely with its cousin the dracaena plant.)
Why Snake Plants Are Perfect for Beginners
Extreme drought tolerance. Their thick, succulent-like leaves store water for weeks — they can go 4–6 weeks without water, making them far more tolerant of neglect than overcare. Think of them as cacti disguised as houseplants. Adaptable light. They survive in low light (slowly) and thrive in bright indirect light, and even handle brief direct sun. Natural pest resistance. Their waxy leaves act as armor — NC State Extension lists no significant problems, noting only occasional mealybugs and spider mites to watch for. Minimal maintenance. Slow growth means repotting every 3–5 years, not annually, with fertilizer only in the growing season and no misting or humidity fuss. Little wonder they top most lists of the best plants for beginners.
Special Benefits Worth Knowing
Air purification. NASA’s Clean Air Study identified snake plants among the top air-purifying houseplants, removing compounds like formaldehyde and benzene, and they’re among the few plants that release oxygen at night via CAM photosynthesis — which is why they’re a popular pick among bedroom plants. (Worth noting: the effect measured in a sealed lab chamber is far stronger than what a few plants do in a real room, so enjoy it as a bonus, not a substitute for ventilation.)
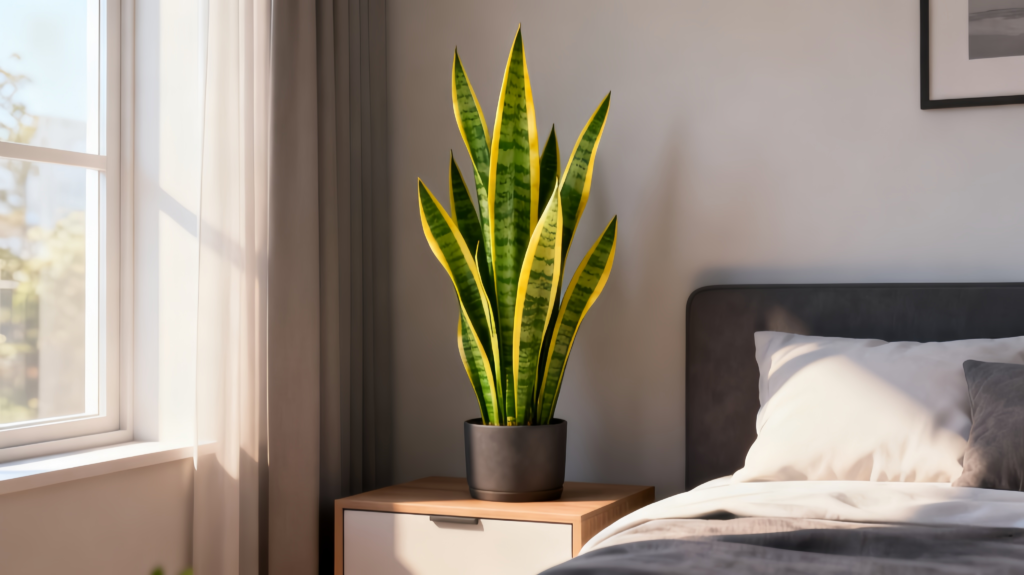
Impressive longevity. With good care, snake plants live for decades — plants you can pass down through generations. Natural growth pattern. Expect 2–4 new leaves per year (completely normal), with mature plants reaching 1–3 feet tall; variegated types (yellow or white edges) grow slower than solid green, so don’t panic if yours seems slow.
Light Requirements: Finding the Perfect Spot
The Ideal Light Condition (Bright Indirect Light)
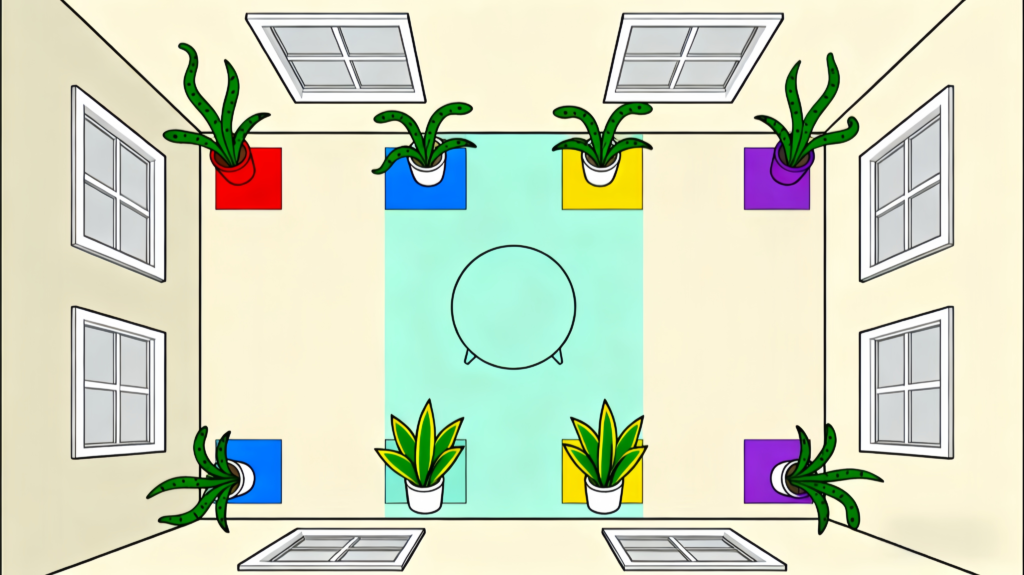
“Bright indirect light” means a spot that gets plenty of natural light but no direct rays striking the leaves. In practice that’s about 5–8 feet from an east- or west-facing window, or 2–3 feet from a north-facing window (Northern Hemisphere). Place it there and you’ll get the fastest growth (3–4 new leaves a year), the most vivid color, and the best variegation on striped varieties. For the bigger picture on placement, see our guide to light requirements.
Understanding the Adaptable Range
Low-light survival. Snake plants genuinely tolerate low light, unlike most houseplants — but expect very slow growth (1–2 leaves a year, sometimes none) and some loss of variegation. It works for offices, bathrooms, and interior rooms, but it’s survival mode, not thriving mode; for more options that cope with it, see low-light plants. Bright indirect (the sweet spot). This is where you get 3–4 new leaves annually, strong color, and optimal photosynthesis. Direct sun. Here’s a point most guides understate: snake plants tolerate more direct sun than the average houseplant — morning sun (roughly 6–10 AM) is gentle and fine, and they can even take several hours of it. What burns them is harsh afternoon and intense summer sun, which scorches leaves into brown crispy or bleached patches. The catch is acclimation: move a plant straight from a shady corner into strong sun and it will scorch, so step it into brighter light gradually over 1–2 weeks. With south-facing windows, use a sheer curtain or keep the plant 6–10 feet back.
Signs Your Light Levels Are Wrong
Too little light: soft/floppy rather than firm leaves, zero growth for 12+ months, severe leaning toward the light, exaggerated spacing between new leaves, and fading variegation. Too much light: brown or yellow crispy spots, bleached/faded color (especially on variegated types), brown dry tips, and an overall washed-out look. How to fix it: for too little, move 1–2 feet closer to the window each week; for too much, move it back or add a sheer curtain — and always transition over 1–2 weeks to prevent shock.
| Light Level | Location | Growth Rate | Variegation | Best For |
|---|---|---|---|---|
| Low Light | 10+ ft from window | 1–2 leaves/year | May fade | Survival only |
| Bright Indirect | 5–8 ft from window | 3–4 leaves/year | Strong & vibrant | Optimal growth ✅ |
| Direct Sun (morning) | East window | 3–4 leaves/year | Good | Tolerable |
| Direct Sun (afternoon) | South/West window | Risk of burn | Can damage | Avoid ❌ |
Watering Guide: The #1 Key to Snake Plant Success
The Core Principle You Must Understand
Here’s the hard truth: the overwhelming majority of snake plant deaths come from overwatering — not drought, not pests, not lack of fertilizer. North Carolina State Extension is blunt about it: well-drained soil and careful watering are a must; do not overwater, or the roots will rot. The golden rule is “when in doubt, don’t water” — and it’s worth knowing that traditional growing guidance lands in exactly the same place, summing it up as water dry rather than wet. Snake plants are succulents in disguise; their thick leaves hold water for weeks. The tricky part is that the plant tells you when it’s thirsty (leaves wrinkle slightly) but gives no warning about overwatering until the roots are already rotting.
Seasonal Watering Schedule
NC State Extension’s guidance lines up with what I’ve found in practice: from spring through autumn, let the soil dry between waterings; in winter, water only every one to two months. Easing off in fall and winter does more than prevent rot — keeping the plant on the dry side as it cools also helps it firm up and handle cold better. Our watering schedules guide has the general framework, but here’s the snake-plant-specific version:
| Season | Frequency | Plant Activity | Key Notes |
|---|---|---|---|
| Spring (Mar–May) | Every 2–3 weeks | Growth resumes | Resume fertilizing |
| Summer (Jun–Aug) | Every 1–2 weeks | Peak growth | Most frequent watering |
| Fall (Sep–Nov) | Every 3–4 weeks | Slowing down | Stop fertilizing by Nov |
| Winter (Dec–Feb) | Every 4–6+ weeks | Dormant | ⚠️ Most critical — don’t overwater |
Three Ways to Check If Your Plant Needs Water
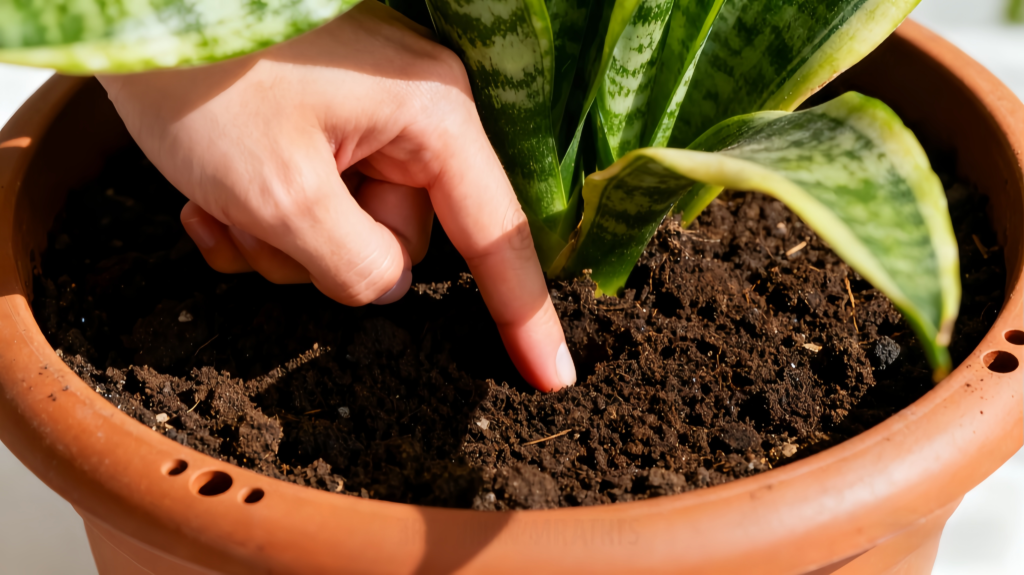
Finger test (most reliable): push your index finger 2–3 inches into the soil and water only if it’s completely dry — wait if you feel any dampness or coolness, and check a few spots since soil dries unevenly. Pot-weight test: lift the pot; water if it’s noticeably light, wait if it still has heft (you’ll learn its “dry weight” over time). Chopstick test: insert a wooden skewer to the bottom, wait 30 seconds, and pull it out — water if it comes out clean and dry, wait if soil sticks or it feels damp. This one checks moisture at root level, not just the surface.
The Proper Watering Technique
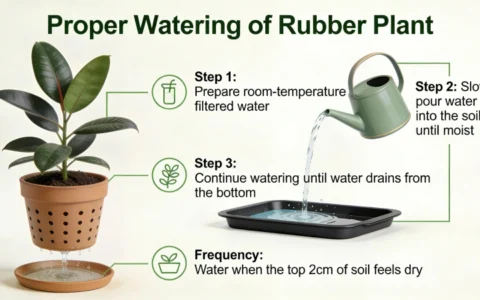
- Prepare: move the plant to a sink, tub, or outdoor spot with drainage.
- Water thoroughly: pour room-temperature water slowly over the soil — avoid the central leaf rosette, which rots if water collects in it — until it runs freely from the drainage holes.
- Drain completely: let it sit 5–10 minutes until dripping stops, then empty the saucer or cache pot.
- Return to position: never let the pot stand in water.
- Mark your calendar: set a reminder to check the plant — not to water it. Big difference.
Water quality: room-temperature filtered water or rainwater is best; tap water left out 24–48 hours is fine (chlorine evaporates). Avoid cold water straight from the tap and softened water (high sodium), and if your tap is high in fluoride, switch to filtered — fluoride can brown the leaf tips.
Overwatering: Recognition & Emergency Treatment
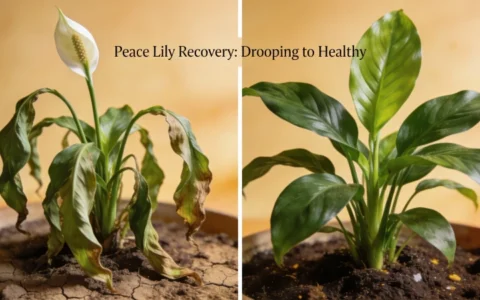
Symptoms (act fast): leaves yellowing from the base, soft/mushy/translucent leaves, black or dark-brown leaf bases, sour or moldy-smelling soil, and black slimy roots. Emergency rescue:
- Remove from the pot within 24 hours and gently shake off the wet soil.
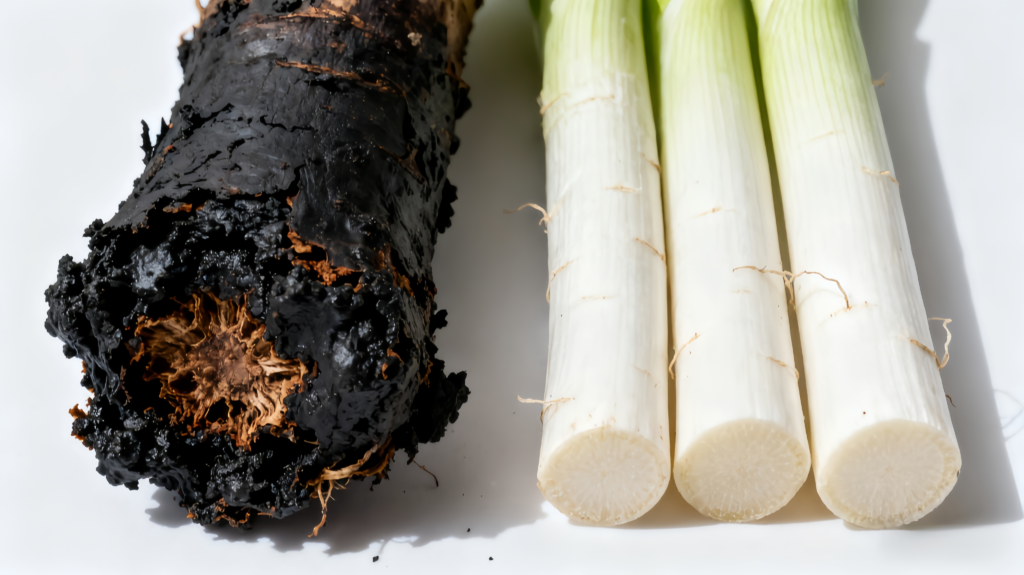
- Assess the roots: healthy = white and firm; rotted = black, mushy, smelly.
- Cut away ALL black/mushy roots with sterilized scissors until only white/tan tissue remains — don’t try to save partially rotted sections.
- Air-dry the root ball on newspaper for 24–48 hours somewhere warm and ventilated. This step is critical; don’t skip it.
- Repot in completely fresh, DRY cactus/succulent soil in a pot with excellent drainage (terracotta is ideal).
- Recovery watering: none in weeks 1–2; a first light ¼-cup at week 3; ½-cup at weeks 5–6; resume normal watering at week 8+.
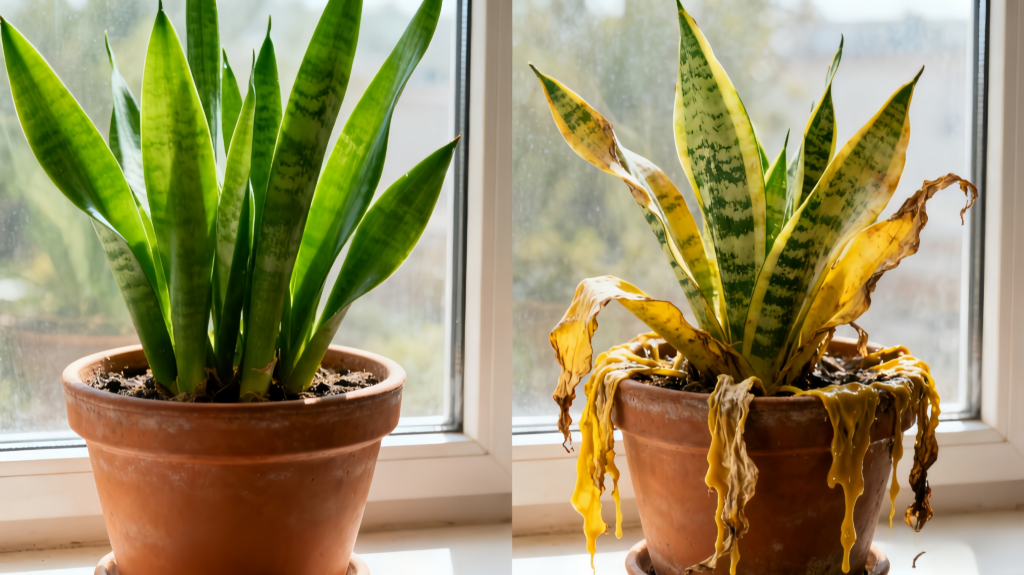
For the full rescue process — including the hydrogen-peroxide soak and how to take backup cuttings — see my dedicated root rot treatment guide. And if your leaves are yellowing but you’re not certain overwatering is the cause, why a snake plant turns yellow walks through every possibility.
Underwatering Signs (Rare But Possible)
Symptoms: leaves wrinkling or puckering lengthwise, brown crispy tips, leaves curling inward. Treatment: water thoroughly and return to your normal schedule — don’t try to “make up” with extra water. The plant usually bounces back within 2–3 weeks. Underwatering is far less dangerous than overwatering: snake plants recover easily from drought but rarely from root rot.
Case Study: How I Revived a Dying Snake Plant
The Crisis (December 2023)
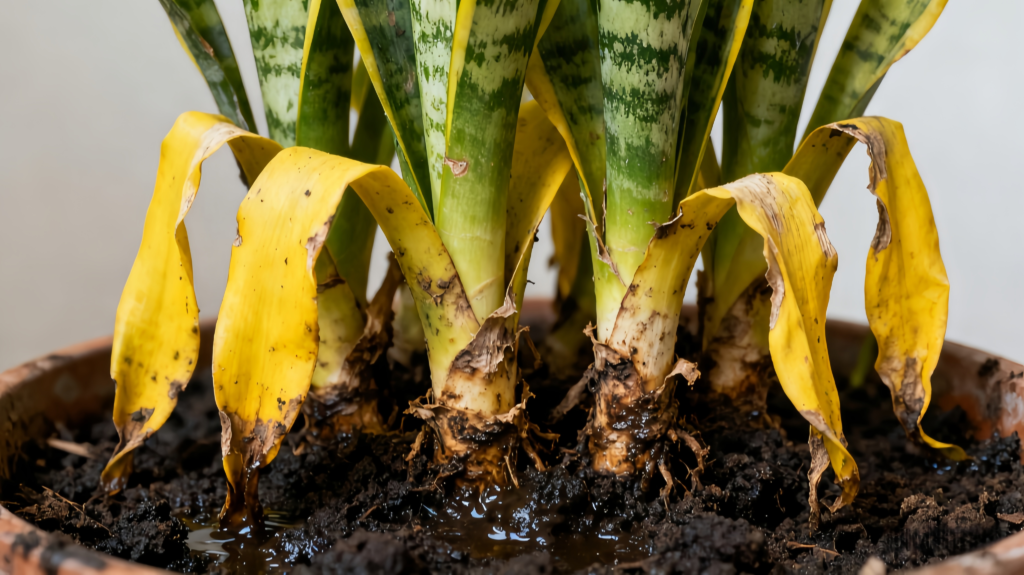
A friend handed me her “dying” snake plant — her last attempt before tossing it. On arrival: 8 of 12 leaves completely yellow, mushy and soft at the base, soil soaking wet and reeking of decay, several leaves flopping over. Her confession: “I watered it every 5 days for 3 months straight.” Ouch.
My Diagnosis & Emergency Treatment
Out of the pot, the damage was worse than expected — about 70% of the roots were black and mushy; of roughly 20 roots, only 4 were still white and healthy. Grim, but not hopeless. I sterilized my scissors with rubbing alcohol and cut away every rotted root (no saving questionable brown sections), removed the 6 fully yellow leaves at the base, leaving 6 green-but-stressed ones, and then did the critical part: I let the root ball air-dry on newspaper for 36 hours.
Fresh start (Day 3): I repotted into 100% DRY cactus mix (no pre-moistening) in a terracotta pot, downsizing from an 8-inch to a 6-inch (smaller pot = faster drying = less rot risk). The decisive move: I didn’t water for two full weeks.
The Recovery Timeline (6-Month Journey)
| Week | Date | Action Taken | Observation |
|---|---|---|---|
| 0 | Dec 15 | Received plant | 8/12 leaves yellow, rotted roots |
| 1 | Dec 22 | Root surgery, repotted | Removed all rot, 6 leaves remain |
| 2 | Dec 29 | No watering | Plant stabilizing |
| 3 | Jan 5 | First water (¼ cup) | Leaves still firm |
| 10 | Feb 23 | Tiny pup spotted! | First sign of new growth |
| 24 | Jun 1 | — | 3 new leaves, plant thriving |
Key Lessons
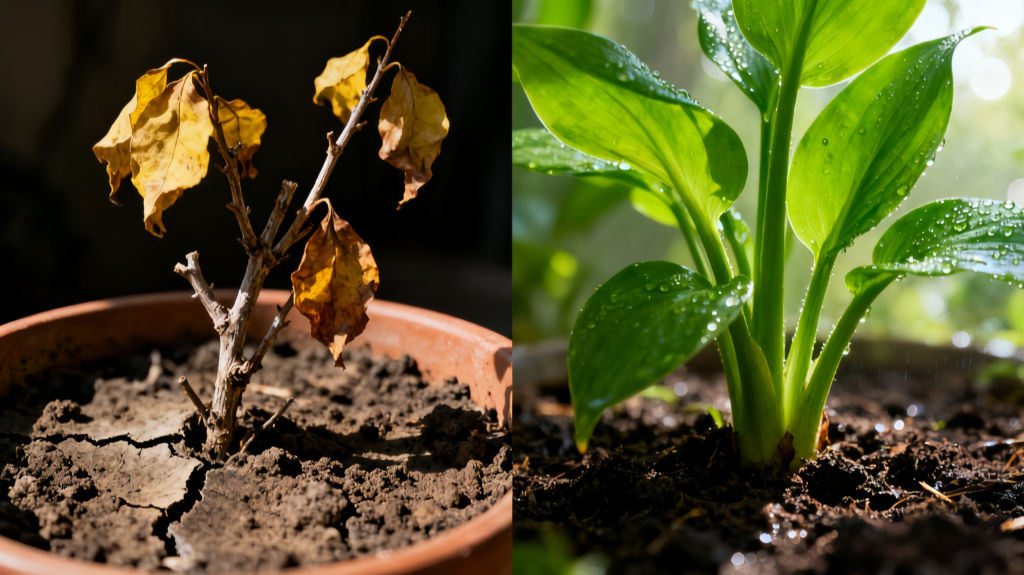
Four healthy roots beat fifteen partially rotted ones, so cut ruthlessly. The two-week wait after repotting let the roots heal and prevented re-rot. Downsizing the pot sped up drying, and terracotta’s breathable sides helped too. Even a snake plant with 70% root loss can recover if you remove all the rot, provide excellent drainage, and resist the urge to overcare.
Soil and Potting: Creating the Right Foundation
The Ideal Soil Composition
The non-negotiable requirement is drainage: snake-plant soil should dry out within 1–2 weeks, and regular potting soil holds far too much moisture. My best-performing DIY mix is 2 parts standard potting soil + 1 part perlite + 1 part coarse sand or pumice (plus an optional ½ part orchid bark for aeration); a traditional, equally effective blend is simply leaf mold, sand, and perlite in equal 1:1:1 parts. For a store-bought shortcut, use a cactus/succulent mix with 20–30% extra perlite, or on a budget, 1 part potting soil to 1 part perlite. Avoid pure potting soil (too dense), garden soil (compacts), moisture-retaining “crystal” soils, and heavy clay mixes. Our soil & fertilizer guide covers the components in more depth.
Pot Selection
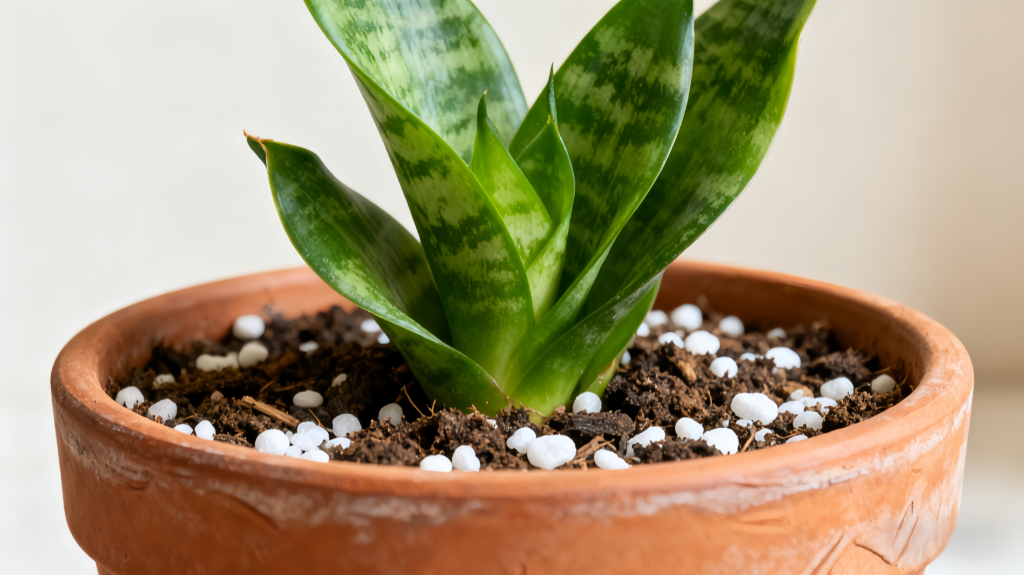
Drainage holes are mandatory — no holes means root rot eventually; if you love a decorative pot without them, use it as a cache pot with the plant in a nursery pot inside. Terracotta is best: porous sides let the soil breathe and dry, it darkens when wet (a handy moisture cue), and it’s heavy enough to resist tipping. Ceramic with drainage is a good, attractive option that holds slightly more moisture, and plastic is fine but easier to overwater. Size up only 1–2 inches beyond the root ball — too much unused soil stays wet — and don’t worry about depth, since snake plants have shallow roots. See our pots & planters guide for specifics.
When and How to Repot
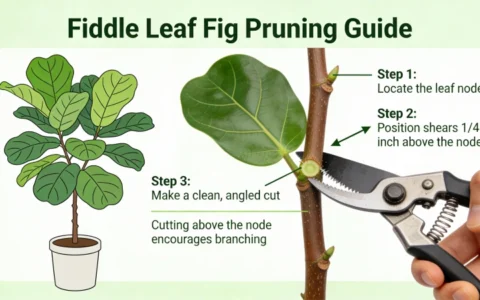
Repot every 3–5 years, or when roots grow out of the drainage holes or the plant is severely pot-bound — ideally in spring as growth resumes. Water 2–3 days beforehand to ease removal, loosen the root ball, trim any black/mushy sections, set it in fresh well-draining soil, and wait about a week before watering normally. Snake plants actually prefer being slightly pot-bound, so don’t repot just because a year has passed; our repotting guide walks through the steps.
Temperature and Humidity: Simple Requirements
Temperature: aim for 60–85°F (15–29°C) — ordinary comfortable room temperature — with the most active growth in the 68–86°F (20–30°C) band. Growth slows below 60°F and stops around 50°F, which is also the minimum tolerance; below 40°F causes severe damage or death, as snake plants aren’t frost-hardy. (NC State Extension notes they tolerate low humidity and cool temperatures around 50°F.) Humidity: they’re very forgiving, thriving in the 20–50% range most homes sit at — no humidifier, pebble trays, or misting needed (misting can actually rot the leaf crevices). Just wipe the leaves with a damp cloth every 2–3 months to clear dust, keep them glossy, and let you check for pests. Avoid cold drafts, direct heating-vent or AC airflow, and winter cold outdoors (bring it in before first frost); you can summer it outdoors in shade if nights stay above 55°F.
Fertilizing: Less Is More
Snake plants are low feeders — in the wild they grow in nutrient-poor soil, and over-fertilizing causes more trouble than under-fertilizing. Feed only in the growing season (roughly March–August), once a month, starting when you see new growth (peak feeding is May–July), and stop completely while dormant (September–February), when feeding just builds up salts and burns roots. Use a balanced liquid (10-10-10 or 20-20-20) at half strength, or a cactus/succulent formula at full strength; always water with plain water first, apply diluted feed 30 minutes later, and never feed dry soil. One detail traditional growers stress: keep the liquid feed out of the central leaf crown, just as you do with water — pooled there it can rot the rosette. Signs of over-fertilizing include brown crispy tips, white crusty salt on the soil, stunted growth, and browning edges; if it happens, stop feeding, flush the soil with plain water for 5 minutes, and wait 2–3 months before resuming at a lower dose. Honestly, if you’re forgetful, you can skip fertilizer entirely — under-feeding is far safer than over-feeding.
How to Propagate Snake Plants: 3 Easy Methods
For more on each technique, see our propagation methods guide — but here are the three that work best for snake plants.
Method 1: Division (Easiest & Fastest)
Success rate 95%+, with instant results. During spring repotting, remove the plant, identify separate rhizome clusters, and gently pull them apart (or use a clean knife). Give each section at least 3 leaves, a healthy root system, and a piece of rhizome, then pot each in fresh cactus mix, water lightly, and let it settle for a week. Division preserves variegation and gives you mature plants immediately.
Method 2: Leaf Cuttings (Most Fun, Requires Patience)
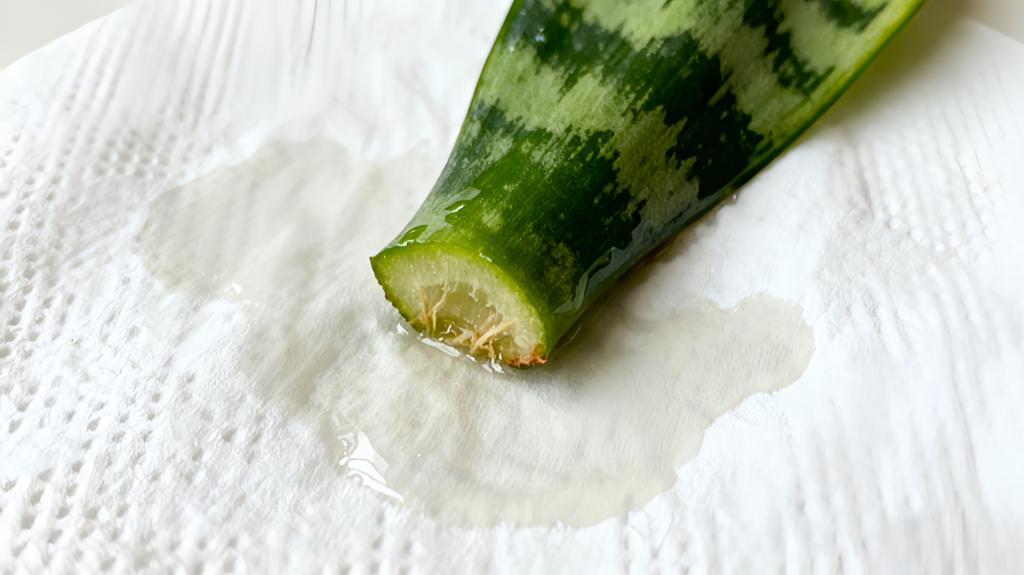
Success rate 70–80%; 3–8 weeks for roots and 2–4 months for a pup. Choose a healthy mature leaf, cut a 3–4 inch section, and mark the “bottom” (leaves have polarity and won’t root upside down). Let it callus on a paper towel for 24–48 hours, then plant the bottom inch in moist cactus soil (or stand it in an inch of water), place in bright indirect light, and don’t disturb it for 6–8 weeks.
Method 3: Rhizome Cuttings (Advanced)
Success rate ~85%; 4–8 weeks for new growth. During repotting, find the thick underground rhizomes, cut sections with at least one growth point and attached roots, and plant at the same depth, watering sparingly until new growth appears.
My Propagation Journey: Leaf to Plant in 6 Months
In March 2023 I cut one 6-inch healthy leaf from my ‘Laurentii’, sterilized the knife, and set the cutting on a paper towel. I almost planted it at 24 hours but waited the full 48 until the cut end fully callused, then potted it in a 50/50 cactus-soil-and-perlite mix in a 4-inch terracotta pot on a north windowsill. I resisted checking for roots and left it alone for 8 weeks — then a gentle tug met resistance: tiny white roots had formed. A small pup broke the soil at week 16, and by week 24 it stood 4 inches tall with its own roots, ready to separate. Out of 8 cuttings, 7 took (about 88%). The lessons: the 48-hour callus is non-negotiable, don’t check roots early (you’ll damage them), no visible growth for 3–4 months is normal, and the biggest mistake I nearly made was watering too often during rooting — I only watered when the soil was bone dry (every 3–4 weeks), which forced strong roots.
Common Problems and Solutions
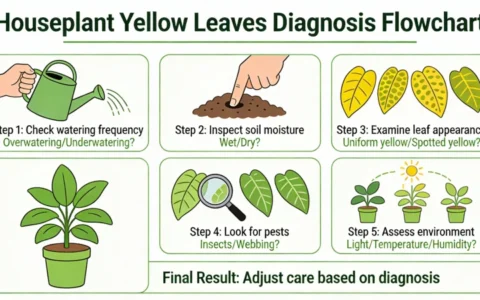
Problem #1: Yellow Leaves (Most Common)
Primary cause: overwatering. Diagnose by checking whether the soil is wet, whether the base of the yellow leaves is mushy or firm, whether the soil smells foul (rot), and — if you can see them — whether the roots are black/slimy or white/firm. If the soil is wet, stop watering and improve drainage; if roots are rotted, follow the emergency protocol above; if only 1–2 old bottom leaves are yellow, that’s natural aging — just remove them. Secondary causes: cold below 50°F and fluoride from tap water (switch to filtered). Our yellow-leaves guide covers the full diagnostic tree.
Problem #2: Root Rot (Emergency)
Identification: sour-smelling soil, black mushy slimy roots, yellowing collapsing leaves, a soft dark base. Follow the emergency treatment from the watering section — out of the pot, cut away all rot, air-dry 24–48 hours, repot in fresh dry cactus soil, and don’t water for two weeks.
Problem #3: Drooping or Falling Leaves
Most likely overwatering (leaves lose rigidity and the base feels soft — treat as root rot). Other causes: root-bound (repot 1–2 inches larger), physical damage (stake or remove the leaf), or too little light (move somewhere brighter, gradually).
Problem #4: No Growth or Stunted Growth
Normal growth is 2–4 leaves a year. No growth can mean winter dormancy (normal Oct–Feb), low light (move closer to a window), root-bound (repot if 5+ years), over-fertilizing (flush and stop), or simply a content plant that grows slowly. Wait until spring to judge.
Problem #5: Pests (Rare)
Spider mites: fine webbing and tiny dots on undersides — wipe with diluted neem oil, isolate the plant, and see our spider mite guide. Mealybugs: white cottony masses — dab with a rubbing-alcohol swab, then insecticidal soap weekly for 3 weeks. Scale: brown bumps — scrape off and apply neem oil. Snake plants rarely get pests thanks to their waxy leaves, so an infestation usually signals stress or a nearby infected plant.
Problem #6: Leaf Spots or Anthracnose (Uncommon)
One thing most snake-plant guides skip: in overly wet, poorly ventilated conditions the plant can develop fungal leaf-spot or anthracnose — brown or dark spots, sometimes with yellow halos. The fix is cultural first: improve drainage and airflow, keep water off the foliage and out of the crown, and remove affected leaves (bin them, don’t compost). If it spreads, a copper-based or Bordeaux-type fungicide is the traditional treatment. Our pests & diseases guide helps with identification.
Problem #7: Brown Leaf Tips
Most often fluoride in tap water (switch to filtered, distilled, or rainwater). Other causes: low humidity (uncommon), over-fertilizing (flush the soil), or salt buildup (flush, or repot if severe). Trim brown tips at an angle for a natural look and fix the underlying cause; for more, see our brown-tips guide.
Quick Diagnosis Order
When something looks off, work through these in order rather than jumping to conclusions:
- Yellow + soft leaves, wet soil → overwatering / root rot → emergency protocol
- Yellow + firm leaves → check for fluoride, natural aging, or cold
- Brown crispy tips → usually fluoride or over-fertilizing → switch water / flush
- Drooping, soft base → overwatering → check roots
- Drooping, firm base → root-bound → repot
- No growth in winter → normal dormancy
- No growth in spring/summer → check light and whether it’s root-bound
- Webbing / white fuzz / brown bumps → spider mites / mealybugs / scale
Snake Plant Varieties: Choose Your Perfect Match
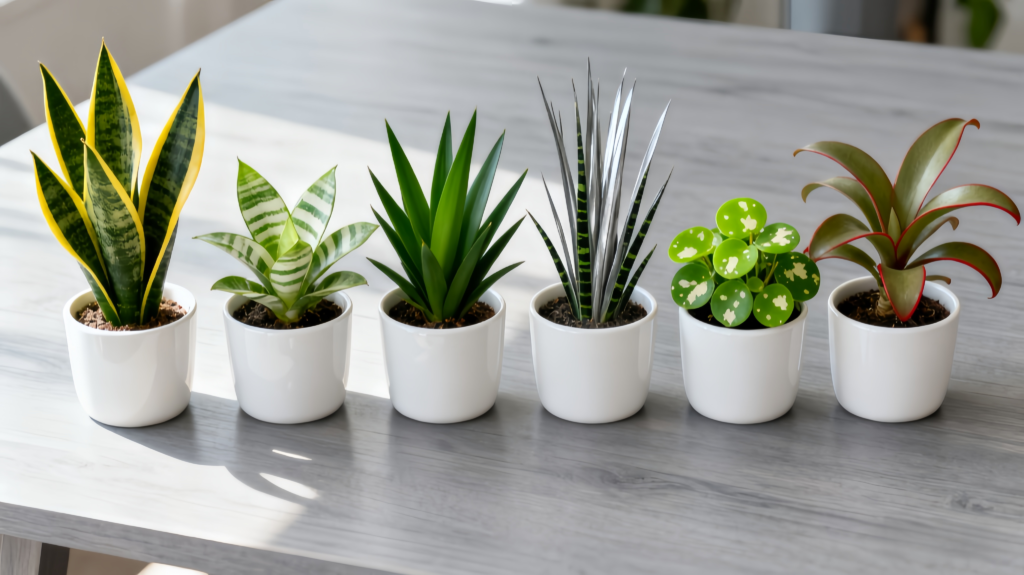
NC State Extension lists many cultivars; here are the ones you’re most likely to find, with the practical differences that matter:
| Variety | Light Needs | Max Height | Growth Speed | Difficulty | Best For |
|---|---|---|---|---|---|
| ‘Laurentii’ | Bright indirect | 2–3 ft | Moderate | Easy | Classic look |
| ‘Moonshine’ | Low–bright | 1.5–2 ft | Slow–moderate | Very easy | Modern, low light |
| ‘Black Gold’ | Bright | 2–3 ft | Moderate | Easy | Drama, contrast |
| Cylindrica | Bright | 2–4 ft | Slow | Easy | Unique shape |
| ‘Bantel’s Sensation’ | Bright only | 2–3 ft | Slow | Moderate | Collectors |
| ‘Whale Fin’ | Bright | 1–3 ft | Very slow | Easy | Minimalist |
Quick picks: beginners → ‘Laurentii’ or ‘Moonshine’; low light → ‘Moonshine’; small spaces → ‘Moonshine’ or ‘Whale Fin’; drama → ‘Black Gold’ or Cylindrica; collectors → ‘Bantel’s Sensation’. On variegation: variegated types need brighter light and fade in low light, and leaf propagation turns them solid green — so to keep the variegation, divide rather than take leaf cuttings.
Seasonal Care Calendar: Year-Round Success
| Season | Watering | Fertilizing | Growth | Key Tasks | Watch For |
|---|---|---|---|---|---|
| Spring | Every 2–3 weeks | Resume monthly | Active | Repot, propagate | New growth |
| Summer | Every 1–2 weeks | Every 2–3 weeks | Peak | Monitor pests | Heat stress, sunburn |
| Fall | Every 3–4 weeks | Stop by November | Slowing | Last propagation | Move from cold windows |
| Winter | Every 4–6+ weeks | Stop | Dormant | Minimal care | Overwatering! ⚠️ |
Winter is the most critical season: soil stays wet longer in the cold and dormant plants barely drink, so this is when most overwatering deaths happen. Check the soil 3 inches deep before every winter watering, and when in doubt, wait.
What Experienced Snake Plant Owners Consistently Say
Across years of houseplant forum discussions, a remarkably consistent picture emerges from people who’ve grown snake plants for 3–10+ years:
- The overwhelming majority of yellowing-leaf problems trace back to overwatering, not under-watering.
- Experienced growers water roughly every 3–4 weeks at most, with many going 6+ weeks (sometimes 2–3 months) in winter with zero problems.
- The single most-repeated tip: “stick your finger 2–3 inches into the soil before watering.”
- ‘Laurentii’ is the most frequently recommended beginner variety; terracotta pots come up again and again for preventing overwatering.
- The universal refrain: “snake plants recover well from neglect, poorly from overcare — better to underwater than overwater.”
It echoes everything in this guide: snake plants thrive on benign neglect, so resist the urge to “help” them too much.
Frequently Asked Questions About Snake Plant Care
How often should I water my snake plant?
Every 2–6 weeks depending on season, temperature, humidity, and light. In summer (peak growth) water every 2–3 weeks; in winter (dormancy) extend to every 4–6 weeks or longer. Always check soil moisture 2–3 inches deep first — if it feels even slightly damp, wait. When uncertain, err on the side of waiting longer.
Can snake plants survive in low light?
Yes — they tolerate low light better than most houseplants, but “tolerate” isn’t “thrive.” In low light (10+ feet from a window) expect very slow growth (1–2 leaves a year or none) and possible loss of variegation. For healthy growth and vibrant color, give them bright indirect light 5–8 feet from an east or north window.
Why are my snake plant leaves turning yellow?
Yellow leaves usually indicate overwatering. Check whether the soil is constantly wet and inspect the roots for black, mushy rot. If confirmed, reduce watering immediately and follow the root rot protocol. Less common causes include cold exposure below 50°F, natural aging of bottom leaves, or fluoride toxicity from tap water.
Do snake plants need fertilizer?
Minimal feeding — they’re low feeders that can survive years without it. For optimal growth, feed once monthly in spring/summer with half-strength liquid fertilizer, and stop completely in fall/winter. Over-fertilizing causes more problems (brown tips, stunted growth) than under-fertilizing.
How do I propagate a snake plant?
Three methods: division (easiest, instant results, preserves variegation by separating rhizome clusters during repotting), leaf cuttings (cut 3–4 inch sections, callus 48 hours, plant in soil — takes 2–4 months and produces solid green offspring on variegated types), and rhizome cuttings. Spring is the best time for all three.
Are snake plants toxic to pets?
Yes, mildly toxic to cats and dogs. They contain saponins that cause nausea, vomiting, diarrhea, and excessive drooling if ingested. It’s not typically life-threatening but is uncomfortable, so keep it out of reach of curious pets and contact your veterinarian if ingestion occurs.
How fast do snake plants grow?
Slowly — typically 2–4 new leaves a year under good conditions, which is normal and healthy. Growth depends on light (brighter = faster), season (active in summer, dormant in winter), and variety (‘Laurentii’ grows faster than ‘Moonshine’). Slow growth also means low maintenance.
When should I repot my snake plant?
Every 3–5 years, or when severely root-bound with roots emerging from drainage holes. Snake plants prefer being slightly pot-bound, so don’t repot just because time has passed. Best timing is spring, and only go up 1–2 inches in pot diameter.
Key Takeaways
- Underwater, don’t overwater: every 2–3 weeks in summer, 4–6+ weeks in winter — when in doubt, wait.
- Check before you pour: soil dry 2–3 inches down is the green light.
- Drainage is everything: fast-draining cacty mix + a pot with holes, ideally terracotta.
- Bright indirect light is the sweet spot: low light = survival, not growth; acclimate to direct sun slowly.
- Keep water and feed out of the central crown: it rots if liquid pools there.
- Slow is normal: 2–4 new leaves a year — and it’s mildly toxic to cats and dogs.
Snake plants are among the most forgiving houseplants you can own. The formula is simple — minimal watering, appropriate light, and resisting the urge to overcare — and these resilient plants bounce back from most mistakes and can thrive for decades. Follow the seasonal guide, check the soil before watering, and be patient. You’ve got this. 🌿
- ZZ Plant Care — another near-indestructible, low-light-tolerant plant
- Aloe Vera Care — a fellow drought-tolerant succulent with the same “don’t overwater” rule
- Jade Plant Care — a classic succulent that also stores water in its leaves
- Succulent Care — the broader drought-tolerant playbook
- Chinese Money Plant — an easy, pet-safe (non-toxic) alternative
This article was created by a professional team. AI tools were used during the research and writing process to enhance efficiency and quality. All information has undergone manual verification and editing to ensure accuracy and practicality. We are committed to providing readers with objective and valuable content.
Publisher::Spring Mei,Please indicate the source when reposting:https://gardeningtoolsgarden.com/how-to-care-for-a-snake-plant/