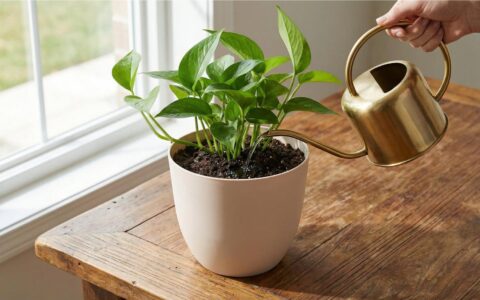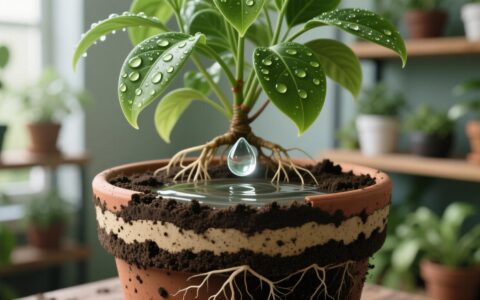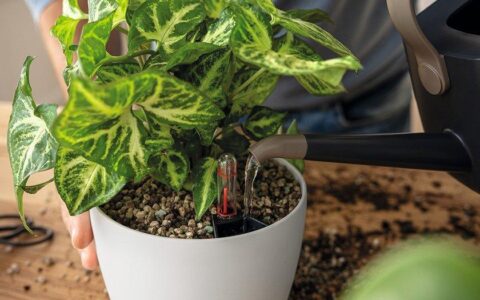
To bottom water a houseplant, set a pot with drainage holes in a tray or basin of water, let the potting mix absorb moisture from below, then lift the pot out and let it drain. The key is to check whether the root zone has absorbed enough water rather than relying on a fixed soaking time.
Bottom watering can be especially useful for plants with moisture-sensitive foliage or potting mixes that are hard to wet evenly from above. Below, you’ll find how to do it, how to tell when it’s finished, and what to check when it isn’t working.
Before You Start: Is Your Plant Ready for Bottom Watering?
Before you begin, check two things: Does your plant actually need water, and does its pot have drainage holes? Bottom watering changes how water enters the potting mix, but it doesn’t change the plant’s moisture requirements.
Check Whether the Potting Mix Needs Water
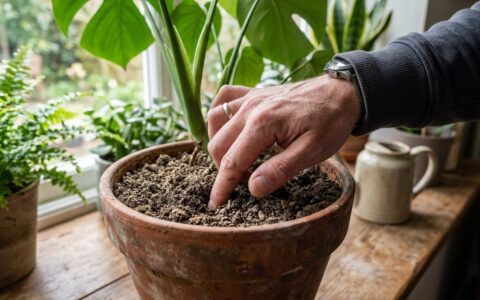
Gently push a finger below the surface to see whether the mix is still moist. The surface alone can mislead you, since it may look dry while the root zone stays damp.
How much drying is appropriate depends on the plant:
- Moisture-loving houseplants: Some prefer the potting mix to stay slightly moist rather than drying out completely.
- Drought-tolerant houseplants: Many succulents and similar plants need the mix to dry more thoroughly between waterings.
If the mix is still too moist for your plant’s needs, wait before watering.
If it’s difficult to judge moisture by touch, a soil moisture meter can provide another clue. See our guide to how to use a soil moisture meter and interpret its readings alongside the condition of the potting mix.
For more on when different houseplants need water, see our How to Water Houseplants guide.
Check the Drainage Holes and Container
Standard bottom watering requires drainage holes. Water enters through them and moves upward into the potting mix. Before you start, make sure:
- The pot has drainage holes that let water in.
- The openings aren’t blocked.
- You can safely lift the pot out of the water afterward.
If your plant sits inside a decorative container without drainage holes, check whether a plastic nursery pot is inside it. If that inner pot has drainage holes, you can lift it out and bottom water it on its own.
A plant growing directly in a pot without drainage holes can’t be watered with the standard bottom-watering method. If that’s your setup, see our guide to watering plants in pots without drainage holes for safer alternatives.
How to Bottom Water Houseplants Step by Step
You don’t need special equipment to bottom water houseplants. A stable basin or tray large enough to hold the pot is usually enough.
Prepare a Tray or Basin
Choose a clean, waterproof container that can hold the pot without tipping. Add enough water to reach the drainage holes when you set the pot inside.
Virginia Tech Extension describes using about 2–3 inches of water in a shallow basin as one practical setup, though the right depth depends on the container and watering method.
Follow these steps:
- Fill the tray or basin. Add enough water to reach the pot’s drainage openings.
- Place the pot upright in the water. Make sure the drainage holes are submerged or in direct contact with the water.
- Check that the pot is stable. It should stay upright while the mix absorbs moisture.
The pot doesn’t need to be deeply submerged. What matters is that water can enter through the drainage holes.

Let the Potting Mix Absorb Water
Water moves upward through the potting mix by capillary action, which lets moisture travel through the small spaces between particles in the growing medium. As the mix absorbs water, moisture gradually spreads from the bottom toward the upper part of the pot. Leave the pot in the basin while this happens.
Watch whether water is reaching the mix and the soil is becoming moist. Some mixes absorb water more readily than others, so don’t assume every pot will behave the same way.
The mix may darken or feel moist near the surface. Those are useful clues that water is moving upward, though they don’t guarantee the whole root zone is wetted evenly.
Remove the Pot and Let It Drain
Once the mix has absorbed enough moisture, carefully lift the pot out of the basin. Let the excess water drain through the drainage holes before returning the plant to its usual spot.
If the plant normally sits in a decorative outer pot or on a saucer, empty any water that collects there. The goal is a root zone that’s adequately moist without the container standing in water afterward.

How Long Should You Bottom Water Plants?
No single soaking time works for every houseplant. Virginia Tech Extension describes about 15–30 minutes as a typical reference range, but the actual moisture level of the potting mix should tell you when to stop.
Why Soaking Time Varies
Several factors affect how quickly a pot absorbs water:
- Pot size: The amount of potting mix influences how water moves through the container.
- Potting mix: Different growing media absorb and distribute moisture at different rates.
- Initial moisture level: Extremely dry mixes may take longer to rewet, especially if they’ve become difficult to absorb water.
- Water contact: Water has to reach the drainage holes before it can enter the mix.
Treat the 15–30-minute range as a reference, not a required soaking period. Some pots may absorb enough moisture sooner, while others may need extra attention.
If the surface is still dry after soaking, don’t automatically leave the pot in water for an extended period. Check the moisture below the surface first.
How to Tell When Bottom Watering Is Done
The most useful check is whether the potting mix around the roots has absorbed enough moisture. To assess your plant:
- Check the soil surface. A noticeably moist surface can indicate that water has traveled upward through the mix.
- Feel below the surface if necessary. If the top still feels dry, gently check whether moisture has reached deeper in the root zone.
- Look for uneven wetting. Some areas may stay dry even when others have absorbed water.
- Remove the pot once the root zone is adequately moist. Let the excess water drain before returning the plant to its usual spot.
A moist surface doesn’t guarantee the entire root zone is evenly wet. Likewise, a dry surface doesn’t necessarily mean the lower mix has received no water.
If the mix has absorbed enough moisture, stop soaking, even if you haven’t reached a particular number of minutes.
If significant areas stay dry, find out why water isn’t being absorbed rather than extending the soaking time indefinitely.
Why Isn’t My Potting Mix Absorbing Water?
If the mix stays dry during bottom watering, first check whether water can enter the pot. If the drainage holes are accessible and in contact with water, the problem may be the growing medium itself.
Check the Drainage Holes and Water Contact
A pot can’t absorb water from below if the water isn’t reaching its drainage openings. If the mix stays dry:
- Check the water level. Add enough water to reach the drainage holes if necessary.
- Inspect the openings. Look for debris or compacted material that may be blocking water entry.
- Check the pot’s position. Make sure it’s upright and the drainage holes can contact the water.
Correct any problems you find, then see whether the mix begins absorbing moisture.
Check for Extremely Dry or Unevenly Wetted Mix
Some potting mixes, particularly those containing peat or bark, can become hydrophobic after drying out excessively, meaning they resist absorbing water. Even when water enters through the drainage holes, extremely dry mix may not rehydrate evenly.
If you suspect this is happening:
- Check the mix below the surface. Find out which areas have absorbed moisture and which are still dry.
- Allow additional absorption if water is entering the mix. Monitor the soil rather than going by elapsed time alone.
- Try slow top watering if bottom watering isn’t working. Apply small amounts of water evenly, giving the mix time to absorb moisture between applications.
- Recheck the root zone. Stop once the mix is adequately moistened and let any excess water drain.
Several gentle passes of top watering may help extremely dry mix absorb water more evenly.
Don’t assume the whole pot is dry just because the surface looks dry. The lower root zone may already hold substantial moisture. The objective is to correct insufficient or uneven wetting, not to keep the pot submerged until every visible part of the soil looks wet.
Which Houseplants Benefit From Bottom Watering?
Bottom watering can be particularly useful for plants with moisture-sensitive foliage, plants whose dense leaves make the soil hard to reach, and some houseplants in potting mix that has become difficult to rewet. It isn’t automatically better than top watering for every species, though.
Plants With Foliage Sensitive to Water
African violets are a common example of houseplants that can benefit from bottom watering. Their foliage can be sensitive to certain watering conditions, and watering from below keeps the leaves dry while supplying moisture to the roots.
It can also be convenient for plants with dense foliage that makes it hard to pour water directly onto the mix.
That doesn’t make bottom watering the only suitable method for these plants. Carefully directed top watering can also work when sensitive foliage is kept dry.
What About Succulents and Other Houseplants?
Some succulents and other common houseplants can also be bottom watered, provided their containers have drainage holes and the mix can absorb water from below.
For succulents, the key consideration is their tolerance for dry conditions. Many need the mix to dry more thoroughly between waterings, and bottom watering doesn’t change that. A succulent shouldn’t be watered more often just because you’re watering from below.
For detailed guidance on the needs of different succulents, see our Succulent Care Guide.
Rather than choosing bottom watering based on a plant’s name alone, consider whether it offers a practical advantage for that plant and its growing conditions.
Bottom Watering Mistakes and Limitations
Bottom watering can be effective, but it doesn’t eliminate overwatering risks or replace the need for proper drainage. It also doesn’t flush accumulated salts through the potting mix the way thorough top watering does.
Can You Overwater Plants by Bottom Watering?
Yes. Bottom watering can still lead to excessively wet growing conditions. The method changes how water enters the pot, not how much moisture the roots can tolerate.
Two mistakes are especially worth avoiding:
- Watering too frequently. Adding water before the mix has dried to the level that suits the plant can keep the root zone excessively wet.
- Leaving the pot standing in water. Keeping a plant in the basin long after it has absorbed enough moisture can prolong saturation around the roots.
When potting mix stays saturated for extended periods, less oxygen reaches the roots, which can contribute to root damage. To reduce the risk, check soil moisture before watering and remove the pot once the root zone has absorbed enough water.
If your plant is declining and you suspect root damage, see our Root Rot Treatment Guide for more detailed guidance.
Why Occasional Top Watering Still Matters
Over time, dissolved minerals from irrigation water and fertilizers can build up as soluble salts in potting mix.
During bottom watering, water moves upward rather than down through the growing medium, so bottom watering doesn’t effectively flush accumulated salts out through the drainage holes. If you’re concerned about mineral content in your water, see our guide to tap water vs. filtered water for houseplants for help comparing water sources. For plants that tolerate watering from above, an occasional thorough top watering can help carry some of those salts out of the pot.
When you do this:
- Apply water from above so it moves through the potting mix.
- Allow excess water to drain through the bottom.
- Discard the runoff instead of leaving the pot sitting in it.
There’s no universal schedule for alternating between top and bottom watering. The right approach depends on the plant, water quality, fertilizer use, and growing conditions.
Bottom watering is a useful option when it solves a particular watering problem. The habits that matter most stay the same: check moisture before watering, make sure the root zone gets enough water, and let the excess drain.
Editorial Note: This article was written and edited by Spring Mei. AI tools may be used to assist with research and organizing information. The final content is reviewed before publication, and important factual claims are checked against reliable sources where appropriate. Personal experience is distinguished from general guidance, and methods are described as personally tested only when they have actually been tested.
Please indicate the source when reposting:https://gardeningtoolsgarden.com/how-to-bottom-water-houseplants/
Author: Spring Mei